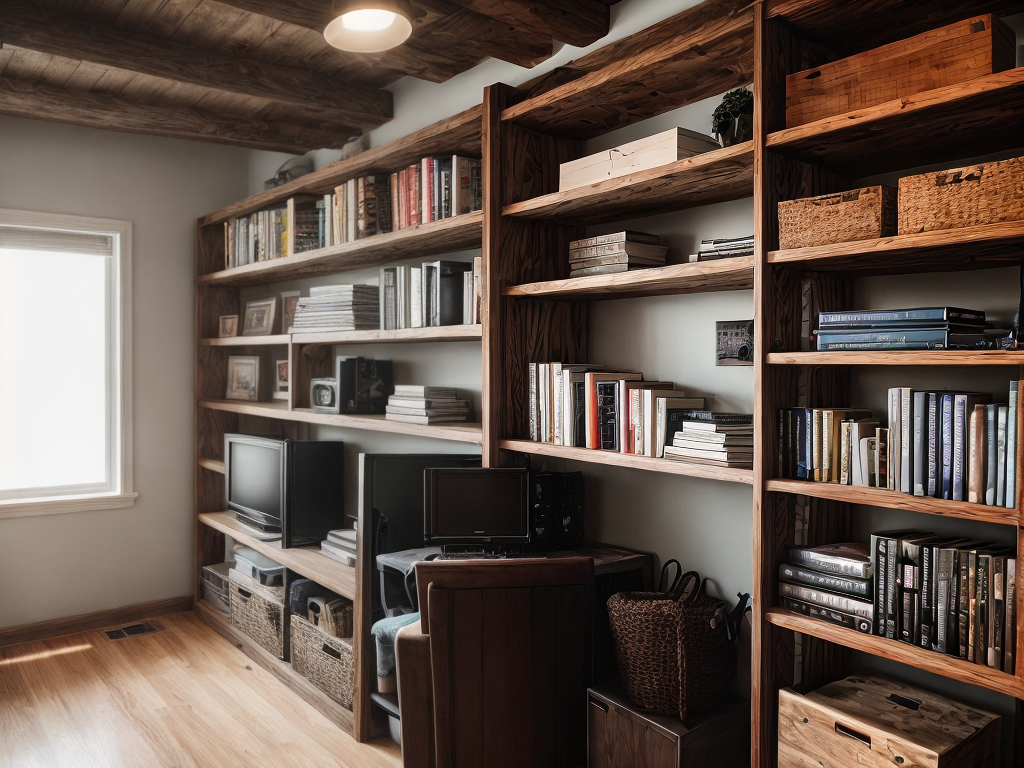
Have you ever wondered how to create a custom bookshelf that perfectly fits your space and showcases your collection of books? Well, look no further. In this guide, I will walk you through the step-by-step process of designing and building your own bookshelf. From choosing the right materials to adding decorative touches, you will learn everything you need to know to create a functional and aesthetically pleasing piece for your home. So, let’s get started and uncover the secrets to crafting a one-of-a-kind bookshelf that will leave your guests in awe.
Key Takeaways
- Select sustainable and eco-friendly materials like FSC or SFI certified wood for your custom bookshelf.
- Take accurate measurements and plan the design carefully to ensure a visually balanced and functional bookshelf.
- Explore different designs and styles to personalize your bookshelf and add a unique touch to your space.
- Use the appropriate tools and wood preparation techniques to ensure clean and accurate cuts, and assemble the bookshelf with proper techniques for stability and durability.
Choosing the Right Materials
When building a custom bookshelf, it is crucial to choose the right materials to ensure durability and functionality. As someone who desires to serve others, I understand the importance of selecting sustainable materials that not only benefit the environment but also provide long-lasting quality.
Choosing sustainable materials is a responsible choice that aligns with our desire to serve others and the planet. Opting for materials that are renewable, recyclable, and have low environmental impact not only reduces our carbon footprint but also supports the well-being of future generations. Look for certifications such as Forest Stewardship Council (FSC) or Sustainable Forestry Initiative (SFI) when selecting wood. These certifications guarantee that the wood comes from responsibly managed forests.
Comparing different wood finishes is another essential aspect of choosing the right materials for your custom bookshelf. The finish not only enhances the aesthetics but also protects the wood from moisture, stains, and scratches. There are various options available, such as natural oils, varnishes, or lacquers. Natural oils provide a more organic and eco-friendly option, while varnishes and lacquers offer a more durable and glossy finish. Consider the overall style and usage of the bookshelf when deciding on the appropriate wood finish.
Measuring and Planning for Your Bookshelf
Now that the right materials have been chosen, it’s time to dive into the process of measuring and planning for your custom bookshelf. Taking accurate measurements is crucial for ensuring that your bookshelf fits perfectly in your desired space. To do this, you will need a tape measure and a notepad to record your measurements.
Start by measuring the height, width, and depth of the area where you plan to place your bookshelf. Be sure to measure the height from the floor to the ceiling, as well as any obstructions such as light fixtures or vents. This will help you determine the maximum height of your bookshelf.
Next, measure the width of the space, taking into account any surrounding furniture or walls. Consider leaving some space on either side of the bookshelf for a visually balanced look.
When measuring the depth, consider the size of the books or items you plan to store on the shelves. You want to ensure that the shelves are deep enough to accommodate your collection without any overhang.
Once you have your measurements, it’s time to start planning the design of your bookshelf. Consider factors such as the number of shelves you want, the spacing between them, and any additional features like drawers or cabinets. Sketch out your design on paper or use a computer program to visualize the final product.
Selecting a Design or Template
To choose a design or template for your custom bookshelf, consider your personal style and the overall aesthetic of your space. It’s important to find a design that not only fits your needs but also adds a unique touch to your home. Here are three tips to help you choose the perfect design for your custom bookshelf:
- Explore Different Styles: Start by exploring different styles and designs that catch your eye. Whether you prefer a modern, minimalist look or a rustic, farmhouse feel, there are countless options to choose from. Look through interior design magazines, browse online platforms, and visit furniture stores to find inspiration for your bookshelf.
- Consider Functionality: While aesthetics are important, don’t forget to consider the functionality of your bookshelf. Think about how you plan to use it – will it primarily hold books, or will you also display decorative objects? Consider whether you want open shelves or ones with doors, as well as the size and shape that will best fit your space.
- Personalize Your Design: Make your bookshelf truly unique by adding personal touches. Consider incorporating elements that reflect your interests or hobbies, such as incorporating a built-in desk or a reading nook. Don’t be afraid to think outside the box and get creative with your design!
Gathering the Necessary Tools
I gathered all the necessary tools for my custom bookshelf project. Tool organization and safety precautions were the two main factors I considered when preparing for this project. I wanted to make sure that I had all the tools I needed in an organized manner to ensure a smooth workflow. Additionally, safety was a top priority, so I made sure to gather the appropriate safety gear to protect myself during the construction process.
To keep everything organized, I created a table to list the tools I needed and their purpose:
| Tool | Purpose |
|---|---|
| Tape Measure | Accurately measure the dimensions |
| Circular Saw | Cut the wooden boards to the right size |
| Drill | Create holes for screws and fasteners |
| Screwdriver Set | Tighten screws and assemble the bookshelf |
Before starting, I also made sure to take some safety precautions. I wore safety goggles to protect my eyes from any flying debris and used ear protection to shield my ears from the loud noise. Additionally, I made sure to work in a well-ventilated area to avoid inhaling any harmful fumes.
Cutting and Preparing the Wood
After gathering all the necessary tools, the next step in creating a custom bookshelf is cutting and preparing the wood. This step is crucial to ensure that your bookshelf is sturdy, well-fitted, and aesthetically pleasing. Here are the key aspects to consider when it comes to cutting techniques and wood selection:
- Cutting Techniques: When it comes to cutting the wood for your bookshelf, precision is essential. To achieve clean and accurate cuts, I recommend using a circular saw or a table saw. Measure twice and cut once to avoid any unnecessary mistakes. Additionally, always wear safety goggles and gloves to protect yourself during the cutting process.
- Wood Selection: Choosing the right type of wood is vital for the durability and overall appearance of your bookshelf. Consider the following options:
- Solid Wood: Solid wood, such as pine, oak, or maple, is a popular choice for bookshelves. It provides strength and a natural, timeless look.
- Plywood: If you’re on a budget, plywood is a cost-effective alternative. It consists of layers of thin wood glued together, offering stability and versatility.
- MDF: Medium-density fiberboard (MDF) is another affordable option. It’s made from compressed wood fibers and offers a smooth and consistent surface for painting or veneering.
Assembling the Bookshelf Frame
Once the wood has been cut and prepared, it’s time to assemble the bookshelf frame. This step is crucial in ensuring the stability and durability of your custom bookshelf. To guide you through the process, I will share some assembling techniques and troubleshooting tips to make your DIY project a success.
To begin, gather all the necessary materials and tools, including the cut wooden pieces, screws, a drill, and a screwdriver. Lay out the wooden pieces on a flat surface and refer to the design plan or instructions provided. Start by attaching the sides of the bookshelf frame to the top and bottom pieces using screws. Ensure that the corners are square by using a carpenter’s square or measuring diagonally from one corner to another. This will prevent any wobbling or instability in the final product.
Next, it’s time to add the shelves. Measure and mark the desired height for each shelf, ensuring they are evenly spaced. Use the same screwing technique as before to attach the shelves to the sides of the frame. To further reinforce the structure, consider adding additional screws or brackets for extra support.
In case you encounter any issues during the assembly process, here are some troubleshooting tips. If the wooden pieces don’t align perfectly, gently tap them into place using a rubber mallet. If the screws don’t go in smoothly, try lubricating them with a bar of soap or wax for easier insertion. Additionally, if any screws strip the wood, remove them and replace them with slightly larger screws.
Adding Shelves and Supports
Now it’s time to move on to the next step: adding shelves and supports. In this section, we’ll cover shelf installation techniques and how to choose sturdy supports for your custom bookshelf. These points are crucial for ensuring the stability and functionality of your bookshelf, so let’s get started!
Shelf Installation Techniques
To add shelves and supports to your custom bookshelf, I recommend using sturdy brackets and measuring accurately for a secure installation. Here are some shelf installation tips to help you avoid common installation mistakes:
- Start by marking the desired height for your shelves using a level and pencil. This will ensure that your shelves are straight and aligned.
- Use a stud finder to locate the wall studs and attach your brackets securely to them. This will provide the necessary support for your shelves, preventing them from sagging or falling.
- When attaching the brackets, make sure to use screws that are appropriate for the type of wall you have. For example, if you have drywall, use drywall anchors for added stability.
Choosing Sturdy Supports
After ensuring a secure installation with proper shelf installation techniques, the next step in creating a custom bookshelf is selecting sturdy supports. Building techniques play a crucial role in determining the strength and stability of your bookshelf. When choosing supports, it’s important to consider both durability and aesthetic appeal. While traditional wooden supports are popular, there are alternative materials that can provide the same level of strength. Metal brackets, for example, offer a sleek and modern look while providing excellent support. Another option is using adjustable shelf brackets, which allow for flexibility in adjusting the height of your shelves. Here is a table summarizing different support options and their characteristics:
| Support Type | Material | Strength | Aesthetic Appeal |
|---|---|---|---|
| Wooden Brackets | Wood | High | Classic and timeless |
| Metal Brackets | Metal | High | Sleek and modern |
| Adjustable Brackets | Metal | Medium | Versatile and flexible |
Sanding and Smoothing the Surfaces
When it comes to sanding and smoothing the surfaces of your custom bookshelf, there are a few key points to keep in mind. First, you’ll need to select the right grit sandpaper for the job, depending on the level of roughness you’re dealing with. Next, using proper sanding techniques, such as sanding in the direction of the grain, will help ensure a smooth and even finish. Lastly, don’t forget to pay attention to any rough edges that may need extra attention to achieve a polished look.
Sandpaper Grit Selection
I carefully select the appropriate grit of sandpaper to effectively sand and smooth the surfaces of the custom bookshelf. This step is crucial to achieve a professional-looking finish. Here are three key points to consider when choosing the right sandpaper grit:
- Start with a coarse grit (around 80-120) to remove any rough spots or imperfections on the surface. This will help to level the wood and prepare it for a smoother finish.
- Transition to a medium grit (around 150-180) to further refine the surface and remove any remaining scratches or marks. This step will help to create a more even and polished look.
- Finish off with a fine grit (around 220-320) to achieve a smooth and silky touch. This final sanding will ensure that the bookshelf’s surfaces are free from any rough edges, making it safe and comfortable to touch.
Proper Sanding Techniques
To achieve a professional-looking finish, it is essential to employ proper sanding techniques in order to effectively sand and smooth the surfaces of the custom bookshelf. Using the right tools and methods can make all the difference in the final result. Here are some key sanding techniques to keep in mind:
| Proper Tools | Sanding Methods |
|---|---|
| Sanding block | Circular motion |
| Sandpaper | Back and forth |
| Sanding sponge | Diagonal strokes |
| Sanding machine | Figure-eight |
| Sanding discs | Follow the grain |
Using a sanding block or sandpaper with the appropriate grit, start by sanding the surface in a circular motion. Then, switch to a back and forth motion, followed by diagonal strokes and figure-eight motions. Remember to always follow the grain for a smooth and even finish. By utilizing these proper sanding techniques, you can ensure that your custom bookshelf will be a masterpiece.
Smoothing Rough Edges
After achieving a smooth and even finish on the surfaces of the custom bookshelf using proper sanding techniques, the next step is to focus on smoothing any rough edges. This will give the bookshelf a polished and professional look. Here are three effective smoothing techniques to follow:
- Start by carefully inspecting the edges of the bookshelf for any imperfections or rough spots. Use your fingertips to feel for any roughness.
- Choose the right sandpaper for the job. For rough edges, a medium-grit sandpaper, such as 120 or 150 grit, is ideal. It will remove any roughness and create a smooth surface.
- Hold the sandpaper firmly and gently sand the rough edges in a back-and-forth motion. Be sure to follow the grain of the wood to avoid damaging the surface.
Applying a Protective Finish
For a durable and polished appearance, add a protective finish to your custom bookshelf. Applying a protective finish not only enhances the beauty of your bookshelf but also protects it from moisture, scratches, and other damage. There are various protective finish application techniques you can use, depending on the type of finish you choose for your bookshelf.
When choosing the right protective finish for your bookshelf, consider factors such as the type of wood, the desired level of glossiness, and the overall aesthetic you want to achieve. Some popular options include polyurethane, varnish, lacquer, and shellac. Polyurethane is a versatile and durable choice, offering excellent protection against wear and tear. Varnish provides a glossy finish and is suitable for both indoor and outdoor bookshelves. Lacquer creates a high-gloss, smooth surface and is commonly used for fine furniture. Shellac, made from natural resin, gives a warm and traditional look to your bookshelf.
Once you’ve chosen the right protective finish, it’s time to apply it to your bookshelf. Before you begin, make sure the surface is clean and free of dust and debris. Apply the finish using a brush or a foam roller, following the manufacturer’s instructions. Work in small sections, applying thin and even coats. Allow each coat to dry thoroughly before applying the next one. Sand lightly between coats to ensure a smooth and flawless finish.
Painting or Staining the Bookshelf
I will choose either painting or staining to give my bookshelf a desired color and finish. Both techniques offer different advantages and can help enhance the overall look of the bookshelf. Here are some painting techniques and color selection tips to consider:
- Brush painting: Using a high-quality paintbrush, apply the paint in smooth, even strokes. This method is great for achieving a traditional and clean look. Make sure to choose a paint color that complements your room’s décor and adds visual interest to the bookshelf.
- Spray painting: If you want a smooth and professional-looking finish, spray painting is the way to go. It allows for an even application of paint and can save you time and effort. Remember to use a well-ventilated area and protect surrounding surfaces from overspray. Select a paint color that matches your desired aesthetic and creates a cohesive look.
- Staining: Staining is a great option if you want to enhance the natural beauty of the wood grain. It gives the bookshelf a warm and rich appearance. Before staining, make sure to prepare the wood surface properly by sanding it down and removing any existing finish. Choose a stain color that complements the wood species and brings out its unique characteristics.
When it comes to color selection, consider the overall color scheme of the room and the mood you want to create. Lighter colors can make a small space feel more open and airy, while darker shades can add drama and sophistication. Take into account the existing furniture and décor to ensure a harmonious look.
Installing Backing or Decorative Elements
Now let’s talk about the next step in creating a custom bookshelf: installing backing or decorative elements. There are various options for backing materials, such as plywood or beadboard, which can add both structural support and aesthetic appeal to your bookshelf. Additionally, you may want to consider applying decorative elements like trim or molding to further enhance the overall look and design of your bookshelf.
Backing Material Options
When installing the backing or decorative elements for your custom bookshelf, consider using a high-quality material that enhances both the functionality and aesthetic appeal of the piece. There are several different backing materials to choose from, each with their own pros and cons. Here are three options to consider:
- Plywood: This is a popular choice due to its durability and affordability. It provides a solid backing that can withstand the weight of books, but it may not offer as much visual appeal as other materials.
- Tempered Glass: If you want to showcase the contents of your bookshelf, tempered glass is a great option. It adds a modern and sleek look to the piece and allows light to pass through, creating a sense of openness. However, it can be more expensive and requires careful handling to prevent breakage.
- Fabric: For a softer and more textured look, fabric can be used as a backing material. It adds warmth and depth to the bookshelf, but may not be as durable or easy to clean as other options.
Consider your desired aesthetic, budget, and practical needs when choosing the backing material for your custom bookshelf.
Applying Decorative Elements
After considering the different backing material options for your custom bookshelf, the next step is to apply the decorative elements by installing the chosen backing material. To add a personal touch to your bookshelf, you can explore different decorative painting techniques. Consider using stencils or hand-painting intricate designs to create a unique and eye-catching backdrop for your books. Another way to elevate the aesthetics of your bookshelf is by incorporating hardware accents. You can choose from a variety of decorative knobs, handles, or hinges that complement the overall style of your bookshelf. These small details can make a big difference in enhancing the overall look and feel of your custom bookshelf. Don’t be afraid to get creative and experiment with different techniques and accents to truly make your bookshelf one-of-a-kind.
Mounting the Bookshelf to the Wall
To securely mount the custom bookshelf to the wall, I recommend using heavy-duty wall anchors for added stability. Here are the steps to follow when mounting your bookshelf:
- Choose the right wall anchors: Look for heavy-duty wall anchors that are specifically designed for mounting shelves. These anchors are strong and durable, ensuring that your bookshelf stays securely attached to the wall.
- Locate the studs: Use a stud finder to locate the studs in your wall. Mounting your bookshelf directly into the studs will provide the strongest support. Mark the stud locations with a pencil.
- Install the wall anchors: Once you have located the studs, determine the spacing for your wall anchors. Make sure to evenly distribute the weight of the bookshelf across multiple anchors. Drill pilot holes into the wall at the marked locations, and then insert the wall anchors.
- Attach the brackets: After the wall anchors are installed, attach the brackets to the wall using screws. Make sure the brackets are level and securely fastened to the wall anchors.
- Secure the bookshelf: Finally, carefully lift the bookshelf and align it with the brackets. Use screws to secure the bookshelf to the brackets, ensuring a tight and secure fit.
Arranging and Organizing Your Books
Now that the bookshelf is securely mounted to the wall, it’s time to organize and arrange your books. As someone who desires serving others, I understand the importance of having a well-organized bookshelf that not only looks appealing but also makes it easy to find and retrieve books. There are two popular methods for arranging books: by genre and by color.
Arranging books by genre is a practical and efficient way to organize your collection. It allows you to group similar books together, making it easier to locate a specific book when you need it. Start by sorting your books into genres such as fiction, non-fiction, biography, self-help, and so on. Within each genre, you can further categorize them based on sub-genres or themes. For example, within the fiction genre, you can have separate sections for mystery, romance, science fiction, and fantasy. This method not only adds a sense of order to your bookshelf but also makes browsing for a particular genre a breeze.
On the other hand, organizing books by color can be visually appealing and can add a touch of creativity to your bookshelf. This method involves arranging books based on their spine color, creating a vibrant and eye-catching display. You can choose to arrange them in a rainbow pattern, starting from red and ending with violet. Alternatively, you can create a more subdued look by arranging books in a gradient pattern, going from light to dark. Keep in mind that this method may make it slightly more challenging to find a specific book, but it does add a unique aesthetic to your bookshelf.
Ultimately, the decision of how to arrange your books comes down to personal preference and the overall look you want to achieve. Whether you choose to arrange them by genre or by color, the key is to create a system that works for you and allows easy access to your books. Happy organizing!
Adding Decorative Touches and Accessories
With the bookshelf fully organized, it’s time to add some decorative touches and accessories to enhance its overall aesthetic. Here are three ways to elevate the look of your custom bookshelf:
- Decorative Hardware: Upgrading the hardware on your bookshelf can make a big difference in its appearance. Consider replacing ordinary knobs or handles with decorative ones that match the style of your room. Whether you choose sleek and modern hardware or ornate and vintage-inspired pieces, the right decorative hardware can add a touch of elegance and personality to your bookshelf.
- Creative Lighting: Lighting plays a crucial role in showcasing your books and adding ambiance to the space. Consider installing LED strip lights along the edges of the bookshelf to create a soft and inviting glow. You can also place small accent lamps or fairy lights on the shelves to highlight specific books or decorative items. These creative lighting options not only add a warm and cozy atmosphere to your reading nook but also make your bookshelf a focal point in the room.
- Personalized Accessories: To truly make your bookshelf unique, incorporate personalized accessories that reflect your interests and style. Display small sculptures or art pieces that hold sentimental value or showcase your hobbies. Add a few potted plants or fresh flowers to bring life and freshness to the space. You can also include decorative bookends or framed photographs to personalize the look of your bookshelf. These personalized accessories not only add character but also make your bookshelf a reflection of your personality.
Maintenance and Care Tips
Maintaining and caring for your custom bookshelf is essential to ensure its longevity and functionality. There are three key aspects to consider: cleaning and dusting, handling and moving, and repairing and refinishing. By properly addressing these points, you can keep your bookshelf in excellent condition and enjoy it for years to come.
Cleaning and Dusting
To keep your custom bookshelf looking its best, regular cleaning and dusting is essential. Here are some simple cleaning techniques and dusting tools that will help you maintain the beauty of your bookshelf:
- Start by removing all the items from the shelves. This will allow you to clean every nook and cranny without any obstructions.
- Use a soft cloth or microfiber duster to gently wipe away the dust from the surface of the shelves. Be sure to reach the corners and edges.
- For hard-to-reach areas, such as intricate carvings or small gaps, use a small paintbrush or an old toothbrush to loosen and remove the dust.
Handling and Moving
When handling and moving your custom bookshelf, it is important to take proper care to avoid any damage or accidents. Here are some moving tips and furniture protection measures to ensure the safety of your bookshelf. Firstly, make sure to empty all the books and remove any decorative items before moving. This will reduce the weight and prevent any items from falling or getting damaged. Next, use furniture sliders or blankets to protect the bookshelf from scratches or dents during transportation. If possible, disassemble the bookshelf into smaller parts to make it easier to move and reduce the risk of accidents. Lastly, use proper lifting techniques and ask for assistance if needed to avoid straining your back or dropping the bookshelf. By following these moving tips and furniture protection measures, you can ensure the safe handling and transportation of your custom bookshelf.
Repairing and Refinishing
After ensuring the safe handling and transportation of your custom bookshelf, it is essential to understand proper maintenance and care tips for repairing and refinishing it. Here are some helpful techniques and tips:
- Repairing Techniques:
- Check for loose screws and tighten them to ensure stability.
- Fill any cracks or holes with wood filler and sand it smooth.
- Replace damaged or broken shelves or parts with new ones.
- Refinishing Tips:
- Start by sanding the entire surface to remove any old finish or imperfections.
- Apply a primer to create a smooth base for painting or staining.
- Choose a high-quality paint or stain to give your bookshelf a fresh look.


