So, you think you’re a master woodworker, huh? Well, if you truly want to achieve mastery, there’s one essential skill you can’t overlook: using a planer. Trust me, it’s not as simple as it seems. This powerful tool can transform rough, uneven wood into smooth, flawless surfaces, but only if you know how to handle it properly. In this guide, I’ll walk you through the essential skills you need to become a planer pro. From safety precautions to choosing the right wood and mastering the feeding technique, I’ve got you covered. So, put down your chisels and get ready to take your woodworking to the next level with the indispensable skill of using a planer. Let’s get started!
Safety Precautions for Using a Planer
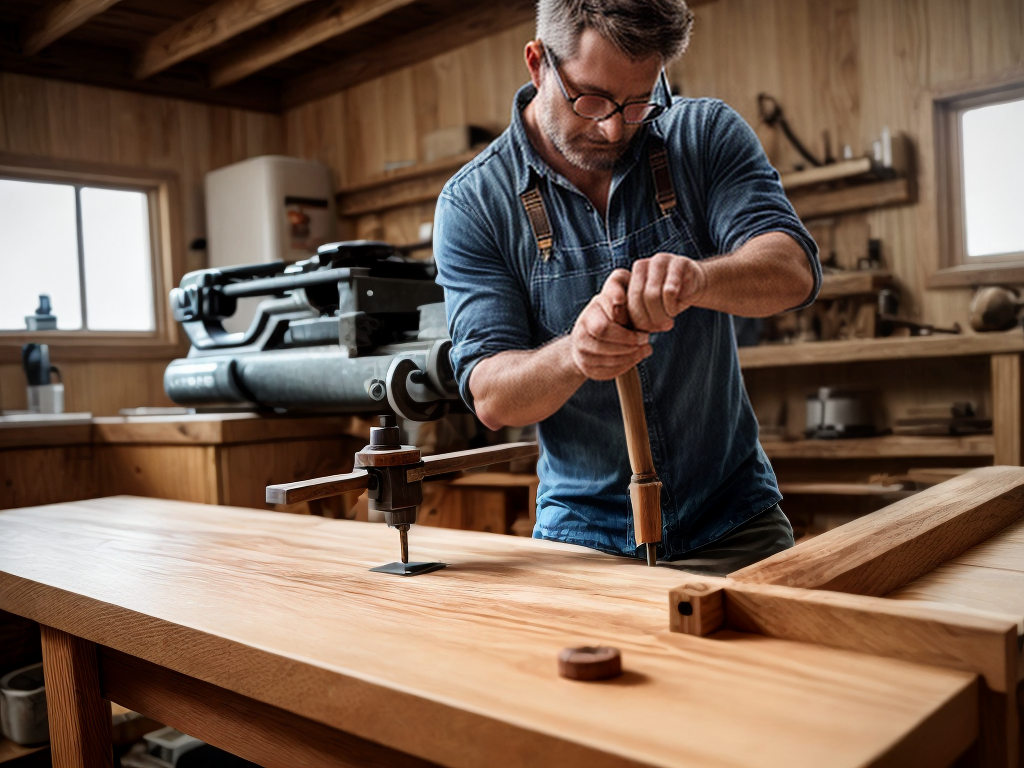
To ensure my safety while using a planer, I always wear protective gear such as safety goggles and a dust mask. Safety gear is essential when operating a planer to prevent common accidents. Woodworking can be a hazardous activity, and it is crucial to prioritize safety at all times. Safety goggles protect my eyes from flying debris and wood chips, while a dust mask shields me from inhaling harmful particles. These precautions are especially important because planers can generate a significant amount of dust and debris. By wearing the proper safety gear, I minimize the risk of eye injuries and respiratory problems. It’s crucial to remember that accidents can happen, but by taking these preventive measures, I can confidently work with a planer and enjoy woodworking without compromising my safety.
Understanding the Different Types of Planers
I prefer to start by familiarizing myself with the different types of planers available in order to choose the most suitable one for my woodworking projects. When it comes to planers, there are a few key factors to consider. One important aspect is the type of planer blade used. There are different types of planer blades, such as straight blades and spiral cutterheads. Straight blades are the most common and are generally easier to sharpen. On the other hand, spiral cutterheads provide a smoother finish and are easier to maintain. Another important consideration is the dust collection system. Dust collection is crucial in the planing process as it helps maintain a clean working environment and prevents the buildup of sawdust, which can affect the accuracy of the planer. Therefore, it is essential to choose a planer with an efficient dust collection system to ensure optimal performance.
Choosing the Right Wood for Planing
One important factor when choosing wood for planing is selecting the appropriate thickness for the desired project. However, choosing the right wood species is equally crucial. There are several factors to consider when selecting wood for planing.
Firstly, consider the hardness of the wood. Softer woods like pine are easier to plane, while harder woods like oak or maple may require more effort. Secondly, consider the grain pattern. Straight-grained woods are easier to work with, as they plane more smoothly and result in a cleaner finish. Lastly, consider the moisture content of the wood. Wood with high moisture content can warp or shrink after planing, affecting the final result.
Choosing the right wood species and considering factors such as hardness, grain pattern, and moisture content will ensure a successful planing project.
Setting up and Calibrating the Planer
Now let’s talk about the important points when it comes to setting up and calibrating your planer. The first point is ensuring proper blade alignment, which is crucial for achieving smooth and even cuts. Additionally, adjusting the feed speed is essential to prevent tear-out and maintain control over the material. Both of these points are key to maximizing the performance and accuracy of your planer.
Proper Blade Alignment
To properly align and calibrate the planer’s blades, it is essential to follow a precise and systematic process. Blade maintenance is crucial for optimal performance and longevity of the planer. When troubleshooting alignment issues, it is important to identify any irregularities in the blade’s position or angle. Here is a step-by-step guide to help you align and calibrate the planer’s blades:
| Steps | Tools Needed |
|---|---|
| Check blade sharpness | Blade sharpener |
| Inspect blade position and angle | Combination square |
| Adjust blade height | Wrench or hex key |
| Align blades parallel to the planer’s bed | Dial indicator |
| Test planer’s performance | Wood scrap and calipers |
Following these steps meticulously will ensure that your planer’s blades are properly aligned, resulting in precise and smooth woodworking. With mastery over blade alignment, you can achieve exceptional results in your woodworking projects.
Adjusting Feed Speed
Continuing from the previous subtopic, I adjust the feed speed to set up and calibrate the planer for optimal performance. One important aspect of feed speed adjustment is adjusting the cutter depth. By carefully adjusting the cutter depth, I ensure that the planer removes just the right amount of material with each pass, preventing any unnecessary waste and preserving the integrity of the wood. Additionally, troubleshooting feed issues is crucial for achieving consistent and smooth results. If I notice that the wood is not feeding through the planer properly, I check for any obstructions in the feed rollers or the feed table. I also make sure that the feed speed is set correctly for the specific type of wood I am working with. By mastering the skill of adjusting feed speed, I can maximize the efficiency and accuracy of my planer.
Proper Techniques for Feeding the Wood Through the Planer
When using a planer, it is important to prioritize safety by wearing protective gear and keeping hands away from the cutting area. Additionally, maintaining a consistent feed rate helps to achieve smooth and even results. To avoid tear-out and snipe, it is crucial to pay attention to the grain direction and use proper techniques, such as supporting the wood properly and making light cuts.
Safety Precautions While Feeding
Before feeding the wood through the planer, I always make sure to secure my grip on the board’s edges. This helps me maintain control and stability while feeding the wood into the machine. Additionally, there are a few important safety precautions to keep in mind:
-
Feeding Speed: It is crucial to feed the wood at a steady and consistent speed. Rushing or forcing the wood through the planer can lead to kickback or uneven cuts. I always take my time and let the planer do its job without applying excessive pressure.
-
Feeding Direction: It is important to feed the wood in the correct direction, usually against the rotation of the cutterhead. This helps ensure a smooth and even cut, reducing the risk of tear-out or splintering.
-
Maintaining a Clear Workspace: Before feeding the wood through the planer, I make sure the surrounding area is clear of any obstructions or debris. This helps prevent accidents and ensures a safe working environment.
Maintaining Consistent Feed Rate
To achieve consistent feed rate and ensure smooth feeding of the wood through the planer, I maintain a steady and controlled motion while applying minimal pressure. This technique helps prevent snipe and ensures an even thickness throughout the entire piece of wood. However, maintaining feed consistency can sometimes be challenging, especially when dealing with different types of wood or encountering feed issues. Troubleshooting feed issues requires careful observation and adjustment. Here is a table summarizing common feed issues, their potential causes, and possible solutions:
| Feed Issue | Potential Cause | Possible Solution |
|---|---|---|
| Uneven Feed Rate | Inconsistent pressure | Adjust pressure to maintain a steady feed rate |
| Tearout | Dull blades or improper grain direction | Ensure sharp blades and feed wood against the grain for less tearout |
| Snipe | Improper alignment or inconsistent pressure at the beginning and end of the board | Properly support the board and maintain consistent pressure throughout the entire pass |
Avoiding Tear-Out and Snipe
To avoid tear-out and snipe when feeding wood through the planer, I employ proper techniques for a smooth and flawless finish. Here are three essential techniques for avoiding tear-out and preventing snipe issues:
-
Grain Orientation: Before running the wood through the planer, carefully examine the grain direction. Always feed the wood with the grain, as planing against the grain increases the risk of tear-out. By following the natural flow of the wood fibers, you can minimize tear-out and achieve better results.
-
Support and Pressure: Properly support the wood throughout the entire planing process. Use infeed and outfeed tables or additional supports to ensure the wood remains flat and level. Apply consistent pressure when feeding the wood into the planer, maintaining a steady and even pace. This helps prevent snipe, which is the unwanted depth difference at the beginning or end of a board.
-
Light Initial Passes: When dealing with highly figured or delicate woods, it’s best to make light initial passes. Gradually remove material in small increments, reducing the risk of tear-out. This technique allows the planer to work more effectively and produces a smoother finish.
Achieving Smooth and Even Surfaces With a Planer
One essential step in achieving smooth and even surfaces with a planer is ensuring that the wood is properly prepared. This involves checking for any imperfections such as knots or cracks and making necessary repairs before running it through the planer. Additionally, it is crucial to choose the right type of wood for your project, as some woods are more prone to tear-out than others. Once the wood is prepared, it is important to use proper techniques for feeding the wood through the planer. This includes making sure the wood is securely held down and feeding it through the planer at a consistent speed. By following these steps and using the planer correctly, you can achieve the smooth and even surfaces desired for your woodworking projects.
| Achieving Smooth and Even Surfaces With a Planer |
|---|
| One essential step in achieving smooth and even surfaces with a planer is ensuring that the wood is properly prepared. This involves checking for any imperfections such as knots or cracks and making necessary repairs before running it through the planer. Additionally, it is crucial to choose the right type of wood for your project, as some woods are more prone to tear-out than others. Once the wood is prepared, it is important to use proper techniques for feeding the wood through the planer. This includes making sure the wood is securely held down and feeding it through the planer at a consistent speed. By following these steps and using the planer correctly, you can achieve the smooth and even surfaces desired for your woodworking projects. |
Maintaining and Troubleshooting Your Planer for Optimal Performance
Now let’s shift our focus to maintaining and troubleshooting your planer for optimal performance. To ensure that your planer continues to function effectively, here are some preventative maintenance tips:
-
Regular cleaning: Dust and debris can accumulate over time and affect the performance of your planer. Clean the blades, rollers, and other parts regularly to keep them in good condition.
-
Blade sharpening: Dull blades can result in rough and uneven surfaces. Sharpen the blades regularly to maintain the quality of your planed wood.
-
Lubrication: Proper lubrication of the moving parts is essential for smooth operation. Apply lubricant to the rollers, gears, and other components to reduce friction and prevent wear.
When troubleshooting common issues with your planer, consider the following:
-
Uneven planing: Check for worn-out blades, misaligned rollers, or an uneven feed rate.
-
Snipe: This occurs when the planer cuts deeper at the beginning or end of the board. Adjust the infeed and outfeed tables to minimize snipe.
-
Motor problems: If your planer is not starting or experiencing power issues, check the electrical connections and the motor for any faults.


