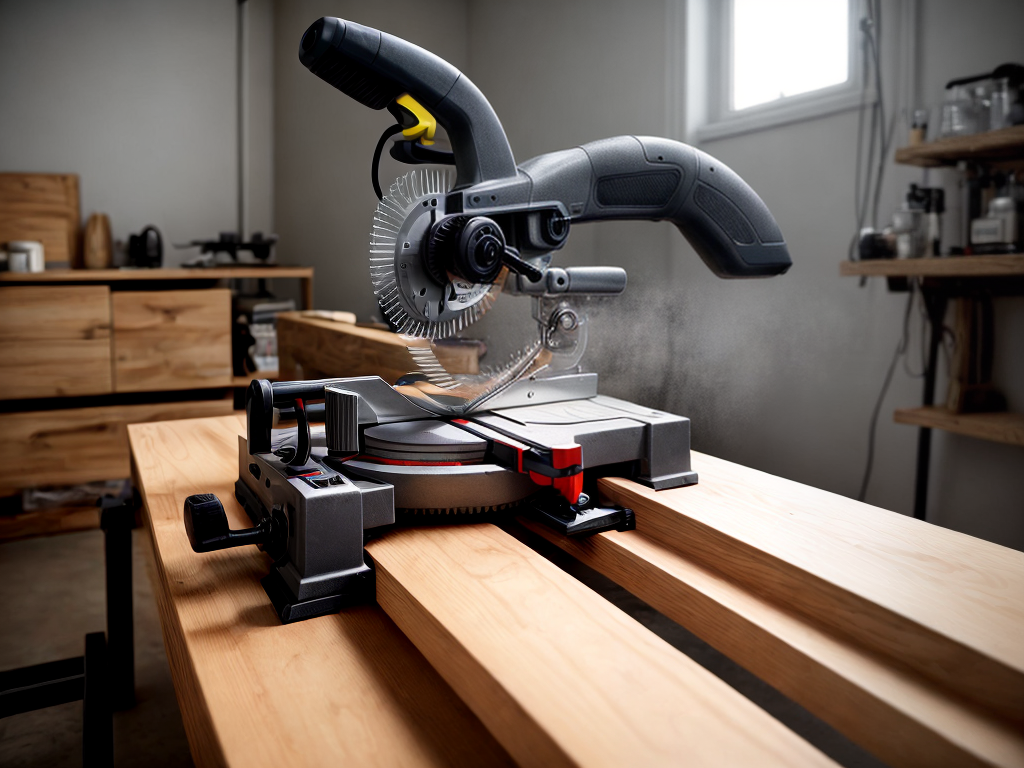
As I stand here, gazing upon the precision of a perfectly cut piece of wood, I am reminded of the joy that comes with mastering the art of the miter saw. If you, like me, crave the satisfaction of achieving flawless cuts, then this guide is for you. With the right techniques and a little practice, you can unlock the true potential of your miter saw and create masterpieces with ease. In this guide, we will explore the essential steps to achieving perfect cuts. From selecting the right blade to ensuring proper alignment, we will cover everything you need to know to become a miter saw virtuoso. So, let’s dive in and let the sawdust fly!
Choosing the Right Blade
To achieve perfect cuts with my miter saw, I start by selecting the right blade for the job. Blade selection is crucial for achieving precise and clean cuts. Different blades are designed for specific materials, such as wood, metal, or plastic. For woodcutting, I look for blades with a high tooth count to ensure smooth cuts. When cutting metal, I opt for blades specifically designed for metalwork, as they have a different tooth configuration. It’s essential to consider the size and thickness of the material as well. Additionally, blade care is vital to maintain its performance and longevity. I make sure to clean the blade regularly, removing any debris or resin buildup. Proper blade care ensures optimal cutting performance and extends the lifespan of the blade.
Setting Up Your Miter Saw
I start by positioning my miter saw at a comfortable height and angle, using the appropriate compound preposition for stability. This ensures that I have a solid base for making accurate cuts. Once my saw is set up, I focus on blade selection. Choosing the right blade is crucial for achieving perfect cuts. Different blades are designed for specific materials, such as wood or metal, and have varying tooth configurations for different cutting applications. It’s important to select a blade that matches the material you are working with to ensure clean and precise cuts. Additionally, I always prioritize safety precautions when setting up my miter saw. This includes wearing safety goggles, using a dust collection system, and keeping my hands clear of the blade at all times. By following these steps, I can achieve mastery in using my miter saw.
| Blade Selection | Safety Precautions |
|---|---|
| Choose a blade that matches the material you are working with | Wear safety goggles |
| Consider tooth count and configuration for the desired cutting application | Use a dust collection system |
| Ensure the blade is properly installed and tightened | Keep hands clear of the blade |
| Regularly inspect the blade for any damage or wear | Follow all manufacturer’s safety guidelines |
| Replace the blade when it becomes dull or damaged | Never remove safety guards |
Adjusting the Cutting Angle
When it comes to achieving perfect cuts with your miter saw, adjusting the cutting angle is crucial. The optimal cutting angles will ensure that your cuts are precise and clean. In this section, I will discuss the importance of precision with angle adjustments and share techniques to help you achieve the perfect cutting angle every time.
Optimal Cutting Angles
Achieving perfect cuts with your miter saw requires adjusting the cutting angle to achieve optimal results. When it comes to optimal cutting angles, there are a few key techniques to keep in mind. First, it’s important to understand the angles at which your miter saw can cut. By adjusting the saw’s bevel angle and miter angle, you can achieve precise cuts for various woodworking projects. However, it’s crucial to avoid common cutting mistakes such as improper alignment or incorrect angle settings. To help you visualize the optimal cutting angles, take a look at the table below:
| Angle (Degrees) | Bevel Angle | Miter Angle |
|---|---|---|
| 45 | 0 | 45 |
| 30 | 0 | 60 |
| 22.5 | 0 | 67.5 |
| 60 | 45 | 15 |
| 90 | 0 | 90 |
Mastering the optimal cutting angles will ensure precise and professional-looking cuts with your miter saw.
Precision With Adjustments
To achieve precise cuts with your miter saw, it is crucial to make precise adjustments to the cutting angle. Precision techniques are essential for achieving accurate and clean cuts. One key aspect of precision adjustments is measuring accuracy. Before making any adjustments, ensure that your measuring tools are accurate and properly calibrated. Take the time to double-check your measurements to avoid any errors. When adjusting the cutting angle, use the saw’s built-in angle gauge or a reliable angle measuring tool. Take into account the specific requirements of your project and make fine-tuned adjustments accordingly. Remember, even the slightest deviation in the cutting angle can affect the accuracy of your cuts. By mastering precision techniques and ensuring measuring accuracy, you can achieve perfect cuts with your miter saw.
Angle Adjustment Techniques
To ensure precise cuts with your miter saw, I adjust the cutting angle using the saw’s built-in angle gauge or a reliable angle measuring tool. Fine tuning accuracy is crucial when it comes to achieving perfect cuts, and mastering angle adjustment techniques is key to achieving this level of precision. Here are some advanced angle manipulation techniques that can help you elevate your cutting skills to the next level:
- Utilize a digital angle finder to measure and adjust angles with utmost accuracy.
- Experiment with bevel cuts to create intricate designs and achieve more complex angles.
- Practice compound angle cutting to enhance your ability to make precise and angled cuts on multiple planes.
Ensuring Proper Blade Alignment
Aligning the blade correctly is essential for achieving precise cuts with a miter saw. As someone seeking mastery in using this tool, it is crucial to understand proper blade alignment and how to troubleshoot common alignment issues. Maintaining the blade is the first step towards ensuring its alignment. Regularly inspect the blade for any signs of damage or dullness, and replace it if necessary. Additionally, keep the blade clean by removing any debris or resin buildup. Common alignment issues can arise from a misaligned blade, which can lead to inaccurate cuts. To troubleshoot this, check that the blade is parallel to the miter saw’s fence and that it is perpendicular to the table. Making these adjustments will help you achieve the perfect cuts you desire.
Using Clamps for Stability
When it comes to achieving perfect cuts with my miter saw, using clamps for stability is crucial. Proper clamp positioning techniques ensure that the workpiece stays secure and doesn’t shift during the cutting process. There are different types of clamps available, such as bar clamps and quick-release clamps, each offering their own advantages in terms of ease of use and stability.
Clamp Positioning Techniques
I position the clamps strategically to ensure stability while using my miter saw. Efficient clamp techniques are crucial for achieving accurate cuts. Here are the advantages of proper clamp positioning:
- Enhanced safety: By securing the workpiece tightly, clamps prevent it from moving or shifting during the cutting process, reducing the risk of accidents and injuries.
- Improved precision: Properly positioned clamps keep the workpiece stable, allowing for precise and accurate cuts. This is especially important when working with delicate materials or intricate angles.
- Increased efficiency: When the workpiece is securely held in place, you can work more efficiently, focusing on the cutting process rather than worrying about stability.
Mastering clamp positioning techniques will not only ensure the safety of your work but also enhance the quality of your cuts. So take the time to position your clamps correctly and enjoy the benefits of stable and precise miter saw cuts.
Types of Clamps
Positioning clamps strategically is crucial for achieving stability and ensuring accurate cuts with your miter saw. When it comes to clamps, there are various types to choose from, each with its own specific uses. The most common types of clamps include bar clamps, quick-release clamps, pipe clamps, and corner clamps. Bar clamps are versatile and can be used for a wide range of projects. Quick-release clamps are ideal for quick and easy adjustments. Pipe clamps are great for securing large pieces of wood. Corner clamps are specifically designed to hold corners at a perfect 90-degree angle. Understanding the different clamp types and their uses will enable you to choose the right clamps for your specific project, ensuring stability and precision throughout the cutting process.
Benefits of Using Clamps
To achieve stability and ensure accurate cuts with your miter saw, it is essential to utilize clamps for added support and precision. Using clamps offers a range of benefits that can greatly enhance your woodworking experience:
- Enhanced stability: Clamps secure your workpiece firmly in place, preventing any movement or shifting that could compromise the accuracy of your cuts.
- Improved safety: By firmly holding your materials, clamps reduce the risk of accidents and help keep your hands clear of the cutting area.
- Consistent results: Clamps ensure that your workpiece remains in the desired position throughout the cutting process, allowing you to achieve precise and consistent cuts.
Mastering the Miter Saw Techniques
By utilizing the proper stance and grip on the miter saw, achieving precise cuts becomes effortless. To master the techniques of using a miter saw, it is crucial to prioritize safety and avoid common mistakes that can compromise the quality of your cuts. Here are some essential tips to keep in mind:
| Technique | Description |
|---|---|
| Stance | Maintain a stable and balanced stance with feet shoulder-width apart. This ensures better control and stability while operating the saw. |
| Grip | Hold the handle firmly with your dominant hand, while using your other hand to support and guide the material being cut. This provides better control and reduces the risk of accidents. |
| Alignment | Always align the cutting line with the blade to ensure accurate cuts. Double-check before making any cuts to avoid errors. |
| Smooth Motion | Move the saw in a smooth and controlled motion, allowing the blade to do the work. Avoid forcing the saw or rushing the cut, as it can lead to inaccurate cuts and potential hazards. |
Mastering these miter saw techniques will enhance your cutting precision and efficiency, ensuring flawless results every time. Remember to prioritize safety and practice these techniques regularly to become a true master of the miter saw.
Maintaining and Cleaning Your Miter Saw
Regular maintenance and cleaning is essential to ensure optimal performance and longevity of your miter saw. Neglecting this aspect can lead to decreased accuracy and even potential safety hazards. To keep your miter saw in top shape, here are some cleaning techniques and maintenance tips to follow:
- Regularly clean the sawdust and debris from the saw’s surface and blade, using compressed air or a soft brush. This prevents buildup and ensures smooth operation.
- Check and tighten all the bolts and screws regularly to maintain stability and prevent any accidents during operation.
- Lubricate the moving parts, such as the pivot points and the slide rails, with appropriate lubricants to minimize friction and ensure smooth cutting action.


