By sheer coincidence, it seems that just as I was about to tackle a project with my power tools, I noticed that some of the parts were worn and in need of replacement. As a professional writer, I understand the importance of maintaining a calm and composed tone, so let’s dive into the world of power tool maintenance together. In this discussion, I’ll guide you through the process of assessing the condition of your power tools, identifying the worn parts, and gathering the necessary tools and replacement parts. But that’s not all – I’ll also share tips on troubleshooting common issues, preventing future wear and tear, and even regular maintenance practices. So, let’s get started on this journey to keep your power tools in top shape for your next project.
Key Takeaways
- Regularly inspecting power tools for signs of wear or damage is essential to ensure their safe and efficient operation.
- Gathering the necessary tools and replacement parts before starting the repair process can save time and prevent delays.
- Powering down and disconnecting the tool, as well as following safety precautions, is crucial to avoid accidents or injuries during the repair.
- Properly removing the old or worn part and cleaning, lubricating, and reassembling the power tool are important steps to ensure its optimal performance and longevity.
Assessing the Condition of Your Power Tools
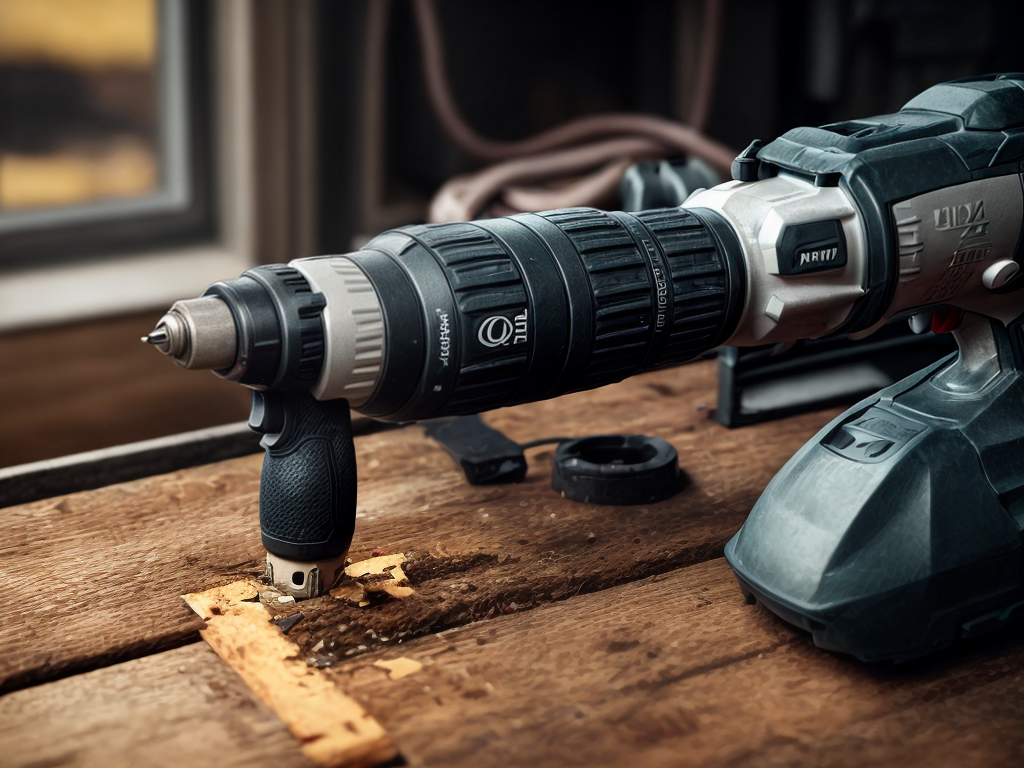
When assessing the condition of your power tools, it is crucial to thoroughly inspect each component for any signs of wear or damage. As someone who desires to serve others by providing reliable tools, it is important to ensure that your power tools are in optimal working condition. Assessing tool performance is vital for maintaining safety and efficiency in your work.
To begin the assessment process, start by examining the exterior of the tool. Look for any visible signs of wear and tear, such as scratches, dents, or rust. These can indicate that the tool has been used extensively or not properly cared for. Additionally, check the power cord for any fraying or exposed wires, as this can pose a serious safety hazard.
Next, focus your attention on the moving parts of the tool. Inspect the blades, bits, or attachments for any signs of damage or dullness. If the blades are chipped or the bits are worn down, it may affect the tool’s performance and compromise the quality of your work. Replace these components as needed to ensure optimum functionality.
Furthermore, pay attention to the motor of the power tool. Listen for any unusual noises or vibrations when the tool is in use. These can be indicative of internal damage or loose components. Regularly cleaning and lubricating the motor can help prevent such issues and prolong the lifespan of your power tool.
Identifying the Worn Parts
When it comes to identifying worn parts in power tools, there are a few common signs of wear to look out for. These signs can include things like visible damage, decreased performance, or unusual noises during operation. By inspecting and assessing these signs, you can determine which specific parts may need to be replaced in order to maintain the functionality and safety of your power tools.
Common Signs of Wear
I can easily identify the worn parts in power tools by looking for common signs of wear. Assessing wear patterns is crucial in determining which parts need to be replaced. One common sign of wear is excessive vibration during operation, indicating that components such as bearings or gears may be worn out. Another sign is decreased performance, such as reduced power or speed, which could be caused by a worn motor or drive belt. Additionally, visible signs of wear, such as frayed cords, cracked housing, or rusted parts, are clear indicators of imminent failure. By paying attention to these signs, I can quickly identify the worn parts in power tools and take the necessary steps to replace them, ensuring optimal performance and safety.
Inspection and Assessment
To identify the worn parts in power tools, a thorough inspection and assessment is necessary. By using effective assessment techniques and troubleshooting methods, you can quickly identify the areas that require attention. Here are three steps to help you in the process:
-
Visual Inspection: Begin by visually inspecting the power tool for any visible signs of wear or damage. Look for cracks, frayed wires, or broken components. Pay close attention to areas that are prone to wear, such as the blades, brushes, and belts.
-
Functional Testing: Perform functional tests to determine if the power tool is operating at its full capacity. Check for any unusual noises, vibrations, or decreased performance. This will help identify any underlying issues that may be causing the wear.
-
Consult the Manual: Refer to the power tool’s manual for specific guidelines on inspection and assessment. The manual will provide valuable information on what to look for and how to troubleshoot common problems.
Gathering the Necessary Tools and Replacement Parts
In order to gather the necessary tools and replacement parts, it is essential to have a clear understanding of the specific requirements for the power tool repair. Proper storage and regular maintenance are crucial to prolonging the lifespan of your power tools. By following these maintenance tips, you can ensure that your tools are always in good working condition.
Firstly, it is important to keep your tools in proper storage when they are not in use. This means finding a dry and secure place to store them, away from extreme temperatures and moisture. Storing them in a toolbox or a designated cabinet will protect them from any potential damage.
Regular maintenance is also key. After each use, make sure to clean your power tools thoroughly to remove any dust, debris, or residue that may have accumulated. This will prevent any build-up that could affect their performance. Additionally, inspect the cords, switches, and blades for any signs of wear or damage. If you notice any issues, it is important to address them promptly to avoid further problems.
When it comes to gathering the necessary tools and replacement parts, it is advisable to consult the user manual or reach out to the manufacturer for guidance. They will be able to provide you with a list of the specific tools and parts required for the repair. It is important to gather all the necessary tools and replacement parts before starting the repair process to ensure a smooth and efficient repair.
Powering Down and Disconnecting the Tool
After gathering the necessary tools and replacement parts, the next step in replacing worn parts in power tools is to power down and disconnect the tool. This step is crucial to ensure safety and prevent accidents. Here are three power tool safety precautions to keep in mind when disconnecting your tool:
-
Turn off the power: Before you begin disconnecting any parts, make sure to switch off the power button or unplug the tool from the power source. This will eliminate the risk of accidental start-up and protect you from potential electric shocks.
-
Remove the battery: If your power tool operates on a battery, it is essential to remove it before proceeding. This will prevent any unintentional activation of the tool while you are working on it. Always handle the battery with care and follow the manufacturer’s instructions for safe removal.
-
Wait for the tool to cool down: Some power tools generate heat during use, and the components may still be hot even after you have turned off the power. Allow the tool to cool down before attempting any repairs or replacements. This will protect you from burns or other injuries that could occur from touching hot surfaces.
Removing the Old or Worn Part
Now let’s talk about removing the old or worn part from our power tool. The first thing we need is the right tools for the job, such as screwdrivers, pliers, or wrenches. Once we have the necessary tools, we can proceed with proper disassembly techniques to safely remove the worn part. Additionally, it’s crucial to identify the worn part accurately to ensure we replace it with the correct replacement.
Tools for Removal
To efficiently remove the old or worn part, I recommend using the appropriate tools for the job. This will ensure a safe and effective removal process. Here are three essential tools you should have on hand:
-
Screwdriver: A good quality screwdriver with the right size and type of head is crucial for removing screws and fasteners. Make sure to choose one that fits snugly in the screw head to avoid stripping or damaging it.
-
Pliers: Pliers are versatile tools that can be used to grip, twist, and pull various components. They are particularly useful for removing stubborn or rusted parts that may be difficult to reach with other tools.
-
Wrench: Depending on the power tool, you may need an adjustable wrench or a specific size wrench to loosen and remove nuts and bolts. Ensure the wrench is the right size and in good condition to prevent slipping and causing accidents.
Remember to always follow safety precautions, such as wearing protective goggles and gloves, and disconnecting the power supply before attempting any removal techniques.
Proper Disassembly Techniques
When removing the old or worn part, it is essential to employ proper disassembly techniques to ensure a safe and effective removal process. By following disassembly precautions and utilizing troubleshooting techniques, you can save time and effort while avoiding potential hazards.
To begin, always refer to the tool’s user manual for specific disassembly instructions. This will provide guidance on the correct sequence of steps and any precautions to take. Additionally, it is important to wear appropriate personal protective equipment, such as safety glasses and gloves, to protect yourself from injury.
To help you visualize the proper disassembly process, refer to the table below:
| Step | Description | Tips |
|---|---|---|
| Step 1 | Disconnect the power source | Ensure the tool is unplugged or the battery is removed |
| Step 2 | Remove any covers or guards | Use a screwdriver or wrench as needed |
| Step 3 | Take note of the part’s orientation and connections | Use a camera or mark the part for easier reassembly |
| Step 4 | Carefully disconnect wires or hoses | Take note of their position and use caution to avoid damage |
| Step 5 | Remove the old or worn part | Follow the manufacturer’s instructions and use appropriate tools |
Identifying Worn Parts
I typically start by inspecting the power tool to identify any worn parts that need to be removed and replaced. This step is crucial to ensure that the right parts are replaced, preventing any further damage and ensuring the tool’s optimal performance. Here are three inspection methods and troubleshooting techniques that can help in identifying worn parts:
-
Visual Inspection: Carefully examine the tool for any visible signs of wear, such as cracks, chips, or excessive rust.
-
Functional Testing: Test the tool’s functionality to identify any issues or abnormalities. Pay attention to any strange noises, vibrations, or decreased performance.
-
Component Comparison: Compare the worn part with a new one. Look for signs of wear, such as excessive wear marks, uneven surfaces, or reduced dimensions.
Inspecting for Additional Damage or Wear
Upon examining the power tool, I carefully look for any signs of additional damage or wear. Proper inspection techniques are crucial in ensuring the safety and efficiency of power tools. It is important to identify any signs of wear and tear to prevent further damage and potential accidents. By conducting a thorough inspection, I can determine if additional parts need to be replaced.
To assist you in understanding the inspection process, I have created a table below:
| Signs of Damage | Signs of Wear and Tear | Actions to Take |
|---|---|---|
| Cracks or dents on the housing | Loose or damaged cords | Replace the damaged parts immediately |
| Rust or corrosion on metal components | Faded or worn-out labels | Clean the rusted areas and replace labels if necessary |
| Excessive vibration or noise | Stiff or sticky controls | Lubricate moving parts and clean controls |
Inspecting for additional damage or wear is not only about maintaining the functionality of the power tool, but also ensuring the safety of the user. By identifying and addressing any signs of damage or wear, accidents can be prevented, and the lifespan of the tool can be extended.
Cleaning and Preparing the Replacement Part
To properly prepare the replacement part, it is important to thoroughly clean and ensure its readiness. Cleaning and lubrication are crucial steps in maintaining the longevity and efficiency of power tools. Here are three essential tasks to complete before installing the replacement part:
-
Cleaning the Part: Start by removing any dirt, debris, or old lubricant from the replacement part. Use a clean cloth or brush to gently wipe away the build-up. Be cautious not to use excessive force that could cause damage. If necessary, use a mild detergent or degreaser to remove stubborn grime. Rinse the part thoroughly and allow it to dry completely before proceeding.
-
Applying Lubrication: Once the part is clean and dry, apply an appropriate lubricant to ensure smooth movement and prevent friction. Choose a lubricant specifically designed for power tools and follow the manufacturer’s instructions for application. Apply the lubricant to all moving parts, such as gears, bearings, and joints. Be careful not to over-lubricate, as excess lubrication can attract debris and cause clogging.
-
Preventing Rust Buildup: Rust can significantly affect the performance and lifespan of power tools. To prevent rust buildup on the replacement part, consider applying a rust inhibitor or protective coating. These products create a barrier between the metal surface and moisture, preventing oxidation and rust formation. Follow the product instructions for proper application and reapply as needed.
Installing the New Part
Now that we have cleaned and prepared the replacement part, it’s time to install it. To do this, we will need a few tools, such as a wrench or screwdriver, depending on the type of part being replaced. The installation process involves carefully removing the old part, aligning the new part properly, and ensuring it is tightened securely.
Tools Needed for Installation
I find that having the necessary tools makes installing a new part in power tools a breeze. Here are three essential tools for installation that will help ensure proper installation techniques:
-
Screwdriver: A screwdriver is a versatile tool that can be used to remove or tighten screws. It is important to use the right size and type of screwdriver to avoid damaging the tool or the new part.
-
Wrench: A wrench is used to tighten or loosen nuts and bolts. It is essential for securing the new part in place. Make sure to use the correct size wrench for a proper fit.
-
Pliers: Pliers are useful for gripping and holding small parts during installation. They can also be used to cut or bend wires if needed. Having a pair of pliers with a comfortable grip will make the installation process easier.
Steps for Removing Old Part
Using the appropriate tools, removing the old part in power tools can be done with ease and precision. To begin the disassembling process, make sure to unplug the power tool and remove any batteries to ensure safety. Then, using a screwdriver or wrench, carefully unscrew any bolts or screws holding the old part in place. It may be helpful to refer to the power tool’s manual or online resources for troubleshooting tips specific to your model. Once the old part is loose, gently wiggle it out, being cautious not to damage any surrounding components. Take note of any connectors or wires attached to the old part and carefully disconnect them. With the old part successfully removed, you are now ready to install the new part.
Proper Alignment and Tightening
To ensure proper alignment and secure installation of the new part, it is essential to follow these steps carefully:
-
Proper lubrication: Before installing the new part, make sure to apply the appropriate lubricant to ensure smooth operation. This will prevent excessive wear and tear on the part and extend its lifespan.
-
Adjusting tension: Some parts, such as belts or chains, require proper tension for optimal performance. Check the manufacturer’s instructions for the recommended tension and adjust accordingly. This will ensure that the part functions correctly and does not slip or break under load.
-
Secure tightening: Once the new part is aligned and lubricated, securely tighten all fasteners to prevent any movement or loosening during use. Use the appropriate tools and apply the recommended torque to ensure a tight and secure fit.
Reassembling the Power Tool
After replacing the worn parts in the power tool, it is essential to carefully reassemble the various components to ensure proper functioning. Reassembling the power tool may seem daunting, but with the right techniques and troubleshooting tips, it can be a straightforward process.
To guide you through the reassembling process, I have prepared a table below that outlines the steps involved:
| Step | Reassembling Technique | Troubleshooting Tip |
|---|---|---|
| 1 | Align the components | Check for any loose parts or misalignment |
| 2 | Secure with screws or bolts | Ensure all screws or bolts are tightened properly |
| 3 | Connect electrical wires | Double-check wire connections for any loose or disconnected wires |
| 4 | Test the power tool | Conduct a test run to ensure all components are functioning correctly |
By following these reassembling techniques, you can ensure that the power tool is put back together correctly. However, if you encounter any issues during the process, refer to the troubleshooting tips. Checking for loose parts or misalignment is crucial, as it can affect the overall performance of the power tool. Additionally, make sure all screws or bolts are tightened properly to prevent any accidents or malfunctions.
Once you have reassembled the power tool, it is essential to conduct a test run. This will allow you to verify that all components are functioning correctly and that the power tool is ready to be used.
Testing the Replacement Part
When it comes to testing the replacement part in power tools, there are two important points to consider. First, it is crucial to ensure the functionality of the replacement part by conducting rigorous tests to check if it performs as expected. Secondly, proper installation techniques must be followed to ensure that the replacement part is securely fitted and will not cause any issues during operation. Testing and installation are key steps in the process of replacing worn parts to ensure the power tool’s optimal performance and safety.
Functionality of Replacement Part
I tested the functionality of the replacement part to ensure it was working properly. Here are three important things to consider when testing a replacement part:
-
Proper installation techniques: Before testing the replacement part, make sure it is installed correctly according to the manufacturer’s instructions. This will ensure that it functions properly and is safe to use.
-
Troubleshooting common issues: If the replacement part is not working as expected, it’s important to troubleshoot the problem. Check for loose connections, damaged wires, or any other issues that may affect its functionality. Refer to the user manual or online resources for troubleshooting tips specific to your power tool.
-
Testing under load: To fully assess the functionality of the replacement part, it’s essential to test it under load. This means using the power tool in a real-life scenario to see if the replacement part can handle the intended workload. Pay attention to any unusual noises, vibrations, or performance issues during the test.
Proper Installation Techniques
To properly test the functionality of a replacement part, ensure that it is installed correctly according to the manufacturer’s instructions. Following proper installation techniques is crucial to ensure the smooth operation of your power tools. One important aspect to consider is proper lubrication techniques. Before installation, make sure to apply the recommended lubricant to all necessary components. This will help reduce friction and prevent premature wear of the replacement part. Additionally, troubleshooting common installation errors is essential for a successful replacement. Double-check that all fasteners are tightened securely, and that there are no loose or misplaced parts. If the replacement part is not functioning as expected, carefully review the installation steps to identify any mistakes or oversights. Taking the time to install the replacement part correctly will ensure optimal performance and extend the lifespan of your power tools.
Troubleshooting Common Issues
In order to effectively troubleshoot common issues with power tools, it is important to familiarize oneself with the various components and their functions. This knowledge will enable you to pinpoint the cause of the problem and take appropriate action. Here are three key steps to troubleshooting common issues and preventing future damage:
-
Identify the issue: Start by observing the power tool’s behavior. Is it making unusual noises? Is it vibrating excessively? Is it overheating or not working at all? By identifying the specific problem, you can narrow down the possible causes and find a solution more efficiently.
-
Inspect the components: Once you have identified the issue, carefully examine the different parts of the power tool. Check for any signs of wear, damage, or loose connections. Common problem areas include the power cord, switches, brushes, and gears. If you notice any issues, such as frayed wires or worn-out brushes, it’s time to replace or repair them.
-
Take corrective action: Depending on the issue, you may need to clean, lubricate, tighten, or replace certain components. Refer to the tool’s manual or consult a professional for guidance. It’s essential to use the correct replacement parts and follow the manufacturer’s instructions to ensure proper functionality and prevent further damage.
Preventing Future Wear and Tear
Regular maintenance and proper usage techniques are essential for preventing future wear and tear on power tools. By taking proactive steps, you can prevent future breakdowns and extend the lifespan of your power tools, ensuring they continue to serve you well in your projects.
One of the most important aspects of preventing wear and tear is regular maintenance. This includes cleaning your power tools after each use, removing any debris or dust that may have accumulated. Additionally, it is crucial to lubricate the moving parts of your tools regularly to reduce friction and prevent unnecessary strain on the components. By keeping your tools clean and well-lubricated, you can minimize the risk of parts wearing out quickly.
Another way to prevent wear and tear is to use your power tools correctly. Each tool comes with a user manual that provides instructions on proper usage. It is important to follow these guidelines to avoid putting undue stress on the tool’s components. Overloading a tool or using it for purposes it was not designed for can lead to premature breakdowns and damage.
Additionally, investing in high-quality accessories and replacement parts can also help prevent wear and tear. Using compatible and durable accessories ensures that your power tools operate smoothly and efficiently, reducing the risk of breakdowns.
Regular Maintenance for Power Tools
I make it a priority to regularly maintain my power tools to ensure their optimal performance and longevity. Regular maintenance is essential for keeping power tools in good working condition and preventing costly repairs or replacements. Here are three reasons why regular maintenance and inspections are important for power tools:
-
Assessing maintenance needs: Regular inspections allow me to assess the maintenance needs of my power tools. By examining the tool’s components, such as the blades, cords, and switches, I can identify any signs of wear and tear or potential issues. This proactive approach helps me address small problems before they escalate into larger ones, saving both time and money in the long run.
-
Ensuring safety: Regular inspections and maintenance also contribute to the safety of using power tools. Faulty or worn-out parts can increase the risk of accidents or injuries. By regularly checking and maintaining my tools, I can minimize the chances of malfunctions or accidents, creating a safer working environment for myself and those around me.
-
Extending tool lifespan: Power tools are an investment, and I want to make sure they last as long as possible. Regular maintenance, including cleaning, lubricating, and replacing worn parts, helps extend the lifespan of my tools. By taking proper care of my power tools, I can maximize their performance and reliability, allowing me to complete projects more efficiently.
Regular maintenance and inspections are crucial for keeping power tools in top condition and ensuring their safe and efficient operation. By assessing maintenance needs, prioritizing safety, and extending the lifespan of my tools, I can continue to rely on them for my projects and serve others effectively.
Resources and Recommendations
To properly maintain and replace worn parts in power tools, it is important to have access to reliable resources and follow recommended guidelines. By utilizing the right resources and following trusted recommendations, you can ensure that your power tools are in good working condition and perform at their best. Here are some resources and recommendations that can help you with troubleshooting techniques and finding the right parts for your power tools:
| Resource | Description | Benefits |
|---|---|---|
| Manufacturer’s Website | The official website of the power tool manufacturer. | Provides detailed information on parts, diagrams, and troubleshooting techniques specific to your power tool model. |
| Online Forums and Communities | Online platforms where power tool enthusiasts and professionals share their knowledge and experiences. | Offers a wealth of information, tips, and recommendations from experienced users. Allows you to ask specific questions and get answers from experts. |
| Local Repair Shops | Local shops that specialize in power tool repairs. | Skilled technicians can diagnose issues, recommend the right parts, and even perform the repairs for you if needed. Offers personalized assistance and expertise. |


