Have you ever wondered how to ensure that your cordless drill stays in top shape and lasts for years to come? Well, look no further because in this discussion, I will guide you through the essential maintenance and care tips for your cordless drill. From regular cleaning and lubrication to inspecting for wear and tear, tightening loose screws, and even handling the drill safely, there are several steps you can take to prolong its lifespan and maximize its performance. So, let’s get started on this journey towards maintaining and caring for your cordless drill, and discover the secrets to its longevity and efficiency.
Key Takeaways
- Regular maintenance is important to prevent issues and extend the lifespan of a cordless drill.
- Cleaning and lubrication help reduce malfunctions and breakdowns.
- Early identification of potential problems through maintenance prevents costly repairs.
- Proper battery maintenance and storage techniques contribute to prolonging battery lifespan.
Importance of Regular Maintenance
Regular maintenance is crucial for ensuring the optimal performance and longevity of your cordless drill. By taking the time to regularly maintain your drill, you can enjoy numerous benefits and maintain its performance for years to come. One of the main advantages of regular maintenance is that it helps to prevent issues that can arise from neglect or wear and tear. By keeping your drill clean and well-lubricated, you can reduce the chances of malfunctions and breakdowns.
Another benefit of regular maintenance is that it helps to maintain the performance of your drill. Over time, dirt, dust, and debris can accumulate on the drill’s components, affecting its efficiency and effectiveness. By cleaning and inspecting your drill regularly, you can ensure that it continues to operate at its best. Regular maintenance also allows you to identify any potential problems early on, preventing them from escalating into more significant issues that may require costly repairs.
Moreover, regular maintenance extends the lifespan of your cordless drill. By taking care of your drill and addressing any issues promptly, you can avoid premature wear and tear. This not only saves you money in the long run but also ensures that your drill remains reliable and functional for all your projects.
Cleaning Your Cordless Drill
Cleaning your cordless drill is an essential part of proper tool maintenance. Regularly removing debris and dust from the drill helps to prevent damage and ensure optimal performance. Additionally, lubricating the moving parts of the drill will help to extend its lifespan and keep it running smoothly.
Proper Tool Maintenance
To ensure optimal performance and longevity of your cordless drill, it is essential to properly maintain and clean it on a regular basis. Cleaning your cordless drill is of utmost importance as it prevents rust and corrosion, which can significantly affect its functionality. By following some simple maintenance steps, you can keep your tool in top shape for years to come.
Here’s a helpful table to guide you through the process:
| Maintenance Step | Frequency |
|---|---|
| Wipe down the drill body with a clean, dry cloth | After each use |
| Clean the chuck and spindle with a small brush | Monthly |
| Check the battery contacts for dirt or debris | Monthly |
| Lubricate moving parts with a light machine oil | Every six months |
| Store the drill in a dry, clean place | After each use |
Removing Debris and Dust
I find it helpful to start by using a soft brush to remove any debris or dust from the exterior of my cordless drill. This simple step ensures that no dirt or particles get inside the drill and cause damage. By gently brushing away the debris, I can prevent any potential blockages that could affect the drill’s performance. Additionally, removing dust regularly helps to maintain the drill’s overall cleanliness and appearance. It’s important to be thorough when cleaning, paying attention to all the nooks and crannies where debris might accumulate. Taking the time to remove debris and prevent dust buildup not only extends the lifespan of my cordless drill but also ensures that it operates at its best every time I use it.
Lubricating Moving Parts
After ensuring that the exterior of my cordless drill is free from debris and dust, it is important to properly lubricate the moving parts for optimal performance. By using the right lubrication techniques, we can ensure that our drill operates smoothly and efficiently. Lubricating the moving parts not only reduces friction but also prevents rust from forming. When it comes to lubrication, it’s essential to choose a lubricant specifically designed for power tools. Apply a small amount of lubricant to the gears, bearings, and other moving parts, making sure to distribute it evenly. Regularly lubricating your cordless drill will extend its lifespan and keep it running at its best. Remember, a well-lubricated drill is a happy drill!
Lubricating Moving Parts
Regularly lubricate the moving parts of your cordless drill to ensure smooth operation and prevent premature wear and tear. Proper lubrication techniques are essential for maintaining the performance and longevity of your tool. When it comes to lubricating your cordless drill, it’s important to avoid common lubrication mistakes that can lead to damage or reduced effectiveness.
To begin, identify the areas that require lubrication. These typically include the chuck, gears, and bearings. Start by removing any debris or dirt from these parts using a clean cloth or brush. Once the surface is clean, apply a few drops of lubricating oil or grease. Be sure to use a lubricant specifically designed for power tools to ensure optimal performance.
When applying the lubricant, use a small brush or applicator to reach the tight spaces and ensure even coverage. Avoid over-lubricating, as this can attract more dirt and debris, leading to clogging or reduced functionality. Additionally, do not use excessive force when lubricating, as it may damage the delicate components of your drill.
Regularly inspect the moving parts of your cordless drill to check for signs of wear or dryness. If you notice any abnormalities, such as excessive noise or stiffness, it may be a sign that lubrication is needed. By taking the time to lubricate your drill properly, you can extend its lifespan and ensure smooth and efficient operation.
Inspecting for Wear and Tear
To ensure the longevity and proper functioning of your cordless drill, it is important to regularly inspect its moving parts for any signs of wear and tear. This wear and tear inspection is crucial in identifying any potential issues that may affect the performance of your drill. Here are some signs of damage to look out for:
-
Friction marks: Check for any visible marks or scratches on the outer surface of the drill. These can indicate excessive friction and may lead to further damage if not addressed promptly.
-
Loose or wobbly parts: Pay attention to any loose or wobbly parts, such as the chuck or the battery compartment. These can affect the stability of your drill and may result in poor performance or even accidents.
-
Unusual noises or vibrations: Listen for any unusual noises or vibrations while operating the drill. These can be indicators of internal damage or misalignment, which should be addressed immediately to prevent further complications.
Regularly inspecting your cordless drill for wear and tear is not only essential for its longevity but also for your safety. By catching any signs of damage early on, you can prevent more serious issues from arising and ensure that your drill continues to work efficiently. Remember, a well-maintained drill is a reliable tool that will serve you well for years to come. So take the time to inspect and care for your drill, and it will reward you with its continued performance.
Tightening Loose Screws and Parts
Inspecting your cordless drill for wear and tear is crucial, and now we will address the next important step in maintenance – tightening any loose screws and parts. When it comes to keeping your cordless drill in top shape, preventing loose parts is essential. Over time, screws and other components can become loose due to regular use and vibrations. This can affect the performance of your drill and even lead to more serious issues if left unattended. So, let’s dive into the process of tightening screws and preventing loose parts.
Firstly, it’s important to note that regular maintenance can go a long way in preventing loose screws and parts. By inspecting your drill before each use, you can quickly identify any screws that may have worked themselves loose. A simple tightening with the appropriate screwdriver is often all that’s needed. Additionally, it’s a good idea to check other parts of your drill, such as the chuck and handle, for any signs of looseness.
To tighten screws effectively, make sure to use the correct screwdriver size and apply enough pressure to secure them firmly. However, be careful not to overtighten, as this can strip the threads or damage the parts. It’s also a good practice to periodically check the tightness of screws and parts during prolonged use, as vibrations can cause them to loosen over time.
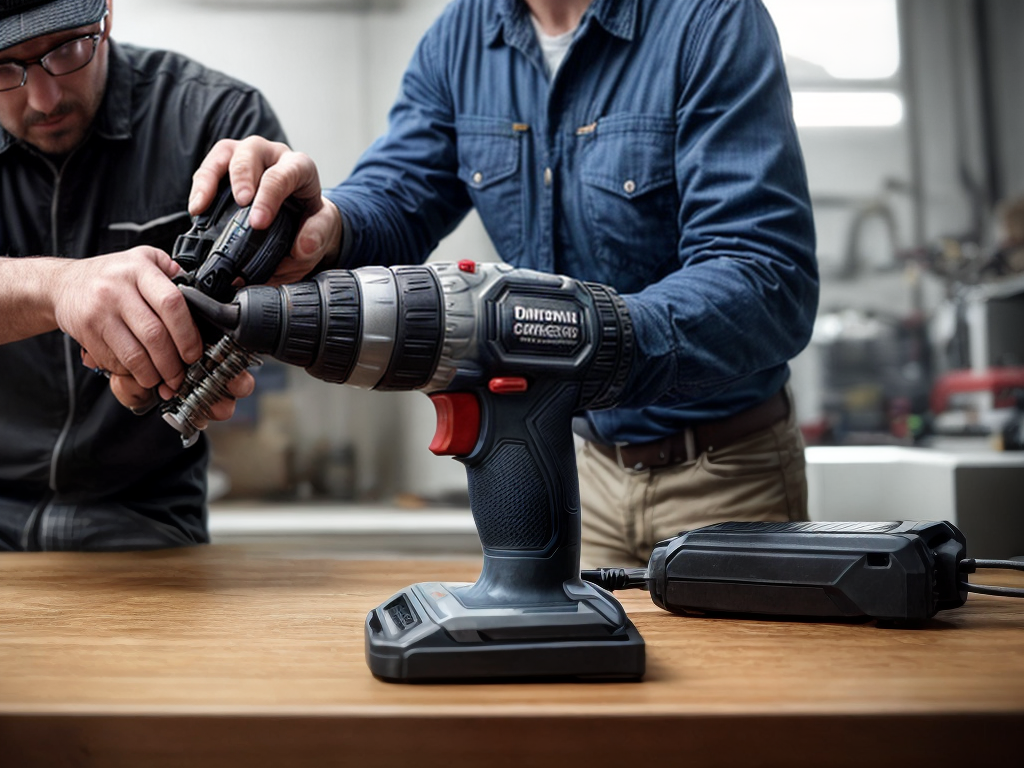
Checking and Adjusting the Chuck
When it comes to maintaining and caring for my cordless drill, one important aspect to consider is checking and adjusting the chuck. There are a few key points to keep in mind when it comes to this task. First, it’s essential to know some chuck maintenance tips to ensure its smooth operation. Second, proper chuck adjustment is crucial for efficient drilling. Lastly, I’ll discuss some common chuck problems that may arise and how to address them.
Chuck Maintenance Tips
As I start discussing chuck maintenance tips, I’ll guide you through the process of checking and adjusting the chuck. When it comes to proper chuck adjustment, it’s important to ensure that the chuck is securely holding the drill bit. Here are some common chuck problems you might encounter:
-
Loose Chuck: If your chuck feels wobbly or doesn’t hold the drill bit tightly, it may be a sign of a loose chuck. In this case, you’ll need to tighten the chuck by turning it clockwise using a chuck key or your hand.
-
Stuck Chuck: Sometimes, the chuck can get stuck and refuse to open or close. To fix this, try applying some lubricating oil to the chuck and gently tapping it with a rubber mallet to free it up.
-
Misaligned Chuck: If your drill bit isn’t centered in the chuck, it can cause drilling inaccuracies. To fix this, loosen the chuck, align the drill bit, and then tighten the chuck securely.
Proper Chuck Adjustment
To properly adjust the chuck, make sure it securely holds the drill bit. Chuck adjustment techniques are essential for maintaining the performance of your cordless drill. Begin by loosening the chuck to its maximum capacity, allowing easy insertion and removal of drill bits. Next, tighten the chuck by hand until it firmly grips the drill bit. Avoid using excessive force, as it may damage the chuck. Once tightened, give the chuck a gentle twist to ensure it remains secure. Regular chuck maintenance steps include cleaning the chuck jaws with a soft cloth and inspecting for any signs of wear or damage. If necessary, lubricate the chuck with a few drops of lightweight oil to keep it operating smoothly. Proper chuck adjustment ensures optimal drilling results and extends the lifespan of your cordless drill.
Common Chuck Problems
One common issue with chucks is the need to regularly check and adjust them to ensure proper functionality. To help you troubleshoot chuck issues and maintain your cordless drill, here are some important points to keep in mind:
- Inspect the chuck: Look for any signs of wear, such as cracks or misalignment.
- Clean the chuck: Remove any debris or dust that may have accumulated inside the chuck, as it can affect its grip.
- Lubricate the chuck: Applying a small amount of lubricant can help improve its performance and prevent rust.
Regular chuck maintenance is crucial in keeping your cordless drill running smoothly. By checking and adjusting the chuck as needed, you can avoid potential problems and ensure that your drill operates at its best.
Proper Storage to Prevent Damage
Storing your cordless drill properly is essential to prevent any potential damage. Proper storage not only ensures the longevity of your drill but also protects it from corrosion and moisture damage. Here are some tips on how to store your cordless drill effectively:
| Tip | Explanation |
|---|---|
| Store in a dry place | Moisture is the enemy of your cordless drill. To protect against moisture damage, store your drill in a dry place, away from any potential sources of water. This could be a toolbox, a cabinet, or even a designated storage case. |
| Use a protective case | Investing in a protective case for your cordless drill is a great way to prevent any accidental damage. A case will not only protect your drill from physical harm but also shield it from moisture and dust. Make sure to choose a case that is specifically designed for your drill model to ensure a proper fit. |
| Remove the battery | Before storing your cordless drill, it is essential to remove the battery. This will prevent any potential leakage or corrosion caused by the battery over time. Store the battery separately in a cool, dry place. |
Storing Batteries for Longevity
When it comes to storing batteries for longevity, there are a few key points to keep in mind. First, it’s important to store batteries in a cool, dry place to prevent overheating and moisture damage. Second, avoid storing batteries in extreme temperatures, as this can have a negative impact on their lifespan. Lastly, it’s best to store batteries in their original packaging or in a separate container to protect them from potential damage.
Battery Storage Tips
To ensure the longevity of your cordless drill batteries, proper storage techniques are essential. Here are some battery storage tips that will help you maintain their performance and extend their lifespan:
- Keep them in a cool, dry place: Store your batteries in a cool and dry environment to prevent moisture and heat damage.
- Avoid extreme temperatures: Exposing your batteries to extreme heat or cold can negatively impact their performance and overall lifespan.
- Use a dedicated battery case: Invest in a dedicated battery case to protect your batteries from physical damage and accidental short-circuiting.
Prolonging Battery Lifespan
I have found that implementing proper storage techniques greatly contributes to prolonging the lifespan of cordless drill batteries. Battery maintenance is crucial for extending battery life, and storing them correctly is a key aspect of this. When it comes to storing your cordless drill batteries, there are a few things you can do to ensure their longevity. First, make sure to store them in a cool and dry place. Excessive heat and moisture can damage the battery cells and reduce their capacity. Additionally, it is important to store the batteries in a partially charged state. A full charge can cause stress on the cells, while a completely discharged battery can lead to irreversible damage. By following these simple storage tips, you can maximize the lifespan of your cordless drill batteries and enjoy long-lasting performance.
Best Battery Storage Practices
Implementing proper storage techniques is essential for maximizing the lifespan of cordless drill batteries, and one of the best practices for achieving this is storing them in a cool and dry place. When it comes to battery care and maintenance, here are some key tips to keep in mind:
- Avoid extreme temperatures: Exposing your batteries to high or low temperatures can shorten their lifespan. It’s best to store them in an area with a consistent temperature between 50-77°F (10-25°C).
- Keep them away from moisture: Moisture can cause corrosion and damage to the battery. Store your batteries in a dry location to prevent any potential issues.
- Protect them from direct sunlight: Exposing batteries to direct sunlight can lead to overheating and damage. Store them in a shaded area or use a protective case to shield them from sunlight.
Charging and Discharging Batteries Correctly
Properly managing the charging and discharging of your cordless drill batteries is essential for their longevity and optimal performance. When it comes to proper battery maintenance, maximizing battery performance is crucial. To ensure that your batteries last as long as possible and deliver the power you need, follow these simple guidelines.
Firstly, it’s important to charge your batteries correctly. Always use the charger provided by the manufacturer, as using incompatible chargers can damage the battery or reduce its lifespan. Avoid overcharging by monitoring the charging time and disconnecting the charger once the battery is fully charged. Overcharging can lead to overheating and shorten the battery’s overall life.
Equally important is discharging your batteries correctly. Avoid fully discharging the battery before recharging it. Instead, try to recharge it when it reaches around 20% to 30% capacity. This helps to prevent deep discharges, which can negatively impact the battery’s performance over time. Additionally, avoid using a partially discharged battery for extended periods, as this can also diminish its overall capacity.
Another tip to maximize battery performance is to store your batteries properly. When not in use, store them in a cool, dry place away from direct sunlight or extreme temperatures. This helps to prevent the battery from deteriorating and extends its overall lifespan.
Maintaining Battery Contacts
To ensure optimal performance, it is important to regularly clean and maintain the battery contacts of your cordless drill. Proper battery maintenance not only prolongs the lifespan of your drill but also prevents corrosion and ensures a reliable power source. Here are some simple steps to keep your battery contacts in top shape:
-
Clean the contacts: Use a soft, dry cloth or a cotton swab to gently wipe the battery contacts. This removes any dirt, dust, or debris that may have accumulated over time. Avoid using abrasive materials or liquids, as they can damage the contacts.
-
Inspect for corrosion: Check the battery contacts for any signs of corrosion, such as a greenish or whitish buildup. If you notice corrosion, it is crucial to remove it promptly. Mix a small amount of baking soda with water to create a paste, then use a toothbrush or cotton swab to gently scrub away the corrosion. Rinse with clean water and dry thoroughly.
-
Apply a protective coating: After cleaning and inspecting the battery contacts, consider applying a thin layer of petroleum jelly or dielectric grease. This helps prevent future corrosion by creating a barrier against moisture and oxidation. Simply dab a small amount onto the contacts and spread it evenly with a cloth or your finger.
Regularly maintaining your cordless drill’s battery contacts is essential for maintaining its performance and prolonging its lifespan. By following these simple steps, you can prevent corrosion and ensure a reliable power source for all your drilling needs. Remember, a little maintenance goes a long way in keeping your cordless drill in peak condition.
Replacing Worn-out Batteries
When it comes to maintaining your cordless drill, one important aspect to consider is replacing worn-out batteries. Battery replacement is a crucial step in ensuring the optimal performance of your cordless drill. Over time, batteries can become worn out and lose their ability to hold a charge effectively. This can lead to reduced power and shorter run times, ultimately hindering your productivity. To avoid these issues, it is essential to know when to replace your worn-out batteries and how to extend their overall lifespan.
The first sign that your battery may need replacing is a noticeable decrease in performance. If you find that your cordless drill is not delivering the same power or is running out of battery quickly, it may be time to invest in a new battery. Additionally, if you notice that the battery is taking longer to charge or is not holding a charge for as long as it used to, this is also an indication that a replacement is necessary.
To extend the life of your batteries, it is important to follow a few simple maintenance practices. First, make sure to store your batteries in a cool and dry place when not in use. Extreme temperatures can negatively affect battery performance. Secondly, avoid overcharging your batteries. Always unplug the charger once the battery is fully charged to prevent excessive heat buildup.
Handling and Using the Drill Safely
When it comes to handling and using a cordless drill safely, there are a few key points to keep in mind. First and foremost, always follow the safety precautions outlined in the drill’s manual. Additionally, proper handling of the drill, such as maintaining a firm grip and using both hands, can help prevent accidents and ensure better control while drilling.
Safety Precautions
For safe handling and use of the cordless drill, it is essential to follow proper safety precautions. Here are some important tips to keep in mind:
- Always wear safety goggles to protect your eyes from flying debris.
- Make sure to use the drill in a well-ventilated area to avoid inhaling harmful fumes.
- Keep your fingers away from the drill bit and other moving parts to prevent accidental injuries.
Safety precautions are of utmost importance when using a cordless drill. Failure to follow these precautions can lead to common safety hazards such as eye injuries, respiratory problems, and finger accidents. By being cautious and mindful of these risks, you can ensure a safe and enjoyable experience while using your cordless drill.
Proper Drill Handling
To handle and use the cordless drill safely, it is important to follow proper guidelines and techniques. Taking care of your drill through regular maintenance is crucial in preventing drill damage and ensuring its longevity. Start by inspecting the drill before each use, making sure there are no loose or damaged parts. Clean the drill regularly, removing any dust or debris that may affect its performance. Keep the battery charged and store it in a cool, dry place. When using the drill, hold it firmly with both hands to maintain control and stability. Avoid excessive force that can strain the motor or cause the bit to break. Remember to use the appropriate drill bit for the task at hand. By following these simple steps, you can ensure the proper maintenance and care of your cordless drill, preventing unnecessary damage and maximizing its lifespan.
Troubleshooting Common Issues
I have encountered several common issues while troubleshooting my cordless drill. When it comes to battery issues, there are a few things to keep in mind. Here are some troubleshooting tips to help you resolve power loss:
-
Check the battery charge: Ensure that the battery is fully charged before using the drill. If the battery is low, it may not provide enough power to operate the drill effectively.
-
Inspect the battery contacts: Over time, the battery contacts can become dirty or corroded, leading to poor electrical connections. Clean the contacts with a soft cloth or brush to ensure good contact between the battery and the drill.
-
Replace the battery: If you’ve tried charging the battery and cleaning the contacts, but the power loss issue persists, it may be time to replace the battery. Batteries have a limited lifespan, and over time, their capacity to hold a charge can diminish.
Resolving power loss is crucial for maintaining optimal performance with your cordless drill. By troubleshooting battery issues and ensuring a full charge, clean contacts, and a functioning battery, you can overcome power loss and continue working efficiently. Remember to follow the manufacturer’s instructions and safety guidelines when handling and maintaining your cordless drill. With proper troubleshooting and care, you can keep your cordless drill in top shape and extend its lifespan.
Professional Maintenance and Repair Options
After troubleshooting common battery issues, the next step in maintaining your cordless drill is exploring professional maintenance and repair options. While DIY maintenance techniques can be effective for minor issues, there are times when it is best to seek professional repair services.
When it comes to professional maintenance and repair, there are several options available. One option is to take your cordless drill to a local repair shop that specializes in power tools. These professionals have the expertise and tools necessary to diagnose and fix complex issues. They can also provide routine maintenance services to keep your drill in top condition.
Another option is to contact the manufacturer or authorized service center for your specific cordless drill model. They will have trained technicians who are familiar with the intricacies of your drill and can provide reliable repair services. It is often recommended to consult the manufacturer’s website or user manual for contact information.
Choosing professional repair services ensures that your cordless drill is in capable hands. These experts have the knowledge and experience to handle any repairs or maintenance needs properly. While it may be tempting to attempt DIY repairs, it is important to consider the risks involved. Mishandling the drill or using incorrect parts can worsen the problem or even cause further damage.


