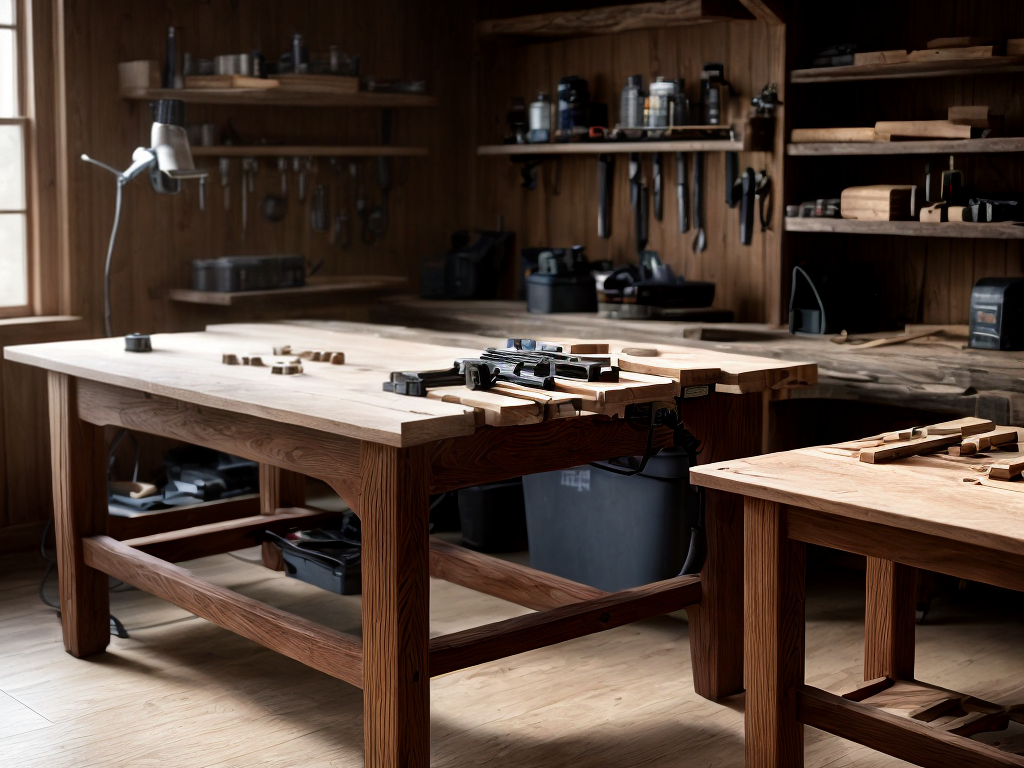
So, you’ve decided to embark on the wonderful journey of woodworking. Congratulations! Now, let’s talk about one tool that can make your life a whole lot easier when it comes to creating those perfect joints – the router. Sure, you could go old-school and spend hours painstakingly chiseling away, but where’s the fun in that? With a router, you can achieve precise and professional-looking joints in no time. But, before we dive into the nitty-gritty, let me give you a little taste of what’s to come. From understanding different router bits to mastering basic techniques, we’ll cover everything you need to know to become a joint-making maestro. So, grab your safety goggles and let’s get started on this woodworking adventure together.
Key Takeaways
- A router offers precise and accurate cuts for tight and seamless woodworking joints.
- Different types of router bits can be used to create a variety of joint options.
- Safety precautions, such as wearing protective gear and using proper hand placement, are essential when using a router.
- Proper router maintenance and troubleshooting techniques are important for optimal performance and achieving professional-looking joints.
Why Use a Router for Woodworking Joints
I find that using a router for woodworking joints offers precise and efficient results. When it comes to creating strong and seamless connections in woodworking projects, the router joint techniques are second to none. The advantages of using a router for joints are numerous and undeniable.
Firstly, a router allows for precise and accurate cuts, ensuring that the joints fit together perfectly. Whether it’s a dovetail joint, a mortise and tenon joint, or a finger joint, the router’s versatility and precision make it the ideal tool for achieving tight and seamless connections. The adjustable depth and width settings allow me to customize the joint to fit my exact specifications, guaranteeing a professional and polished finish.
Additionally, using a router for joints saves me time and effort. With its powerful motor and sharp cutting bits, the router effortlessly removes excess material, creating clean and smooth joints in a fraction of the time it would take using traditional hand tools. This efficiency not only speeds up the woodworking process but also ensures consistent and accurate results.
Furthermore, the router offers a wide range of joint options. From simple butt joints to more complex joinery techniques like the box joint or the dado joint, the router can handle them all. With the right bits and accessories, I can easily switch between different joint styles, allowing me to tackle various woodworking projects with ease and versatility.
Understanding Different Router Bits
When it comes to using a router for woodworking joints, understanding the different router bits is key. Router bit options are vast, ranging from straight bits to dovetail bits, and each bit serves a specific purpose. Choosing the right bit for your woodworking project is crucial for achieving clean and precise cuts.
Router Bit Options
To understand different router bits for woodworking joints, it is helpful to explore the various options available. When it comes to router bit types, there are a few key ones to consider. Straight bits are commonly used for edge cutting and dadoes, while flush-trim bits are great for trimming edges flush with a template. Chamfer and round-over bits can add decorative edges to your workpieces. For more complex joints, such as dovetails or box joints, specialty bits like dovetail and box joint bits are essential. It is important to note that proper router bit maintenance is crucial to ensure their longevity and performance. Regular cleaning, sharpening, and proper storage will help keep your router bits in top shape and ready for your next woodworking project.
Choosing the Right Bit
There are various router bits available that are essential in understanding different woodworking joints. When it comes to router bit selection, it’s important to choose the right bit for the specific joint you want to create. Here are five key factors to consider when choosing a router bit:
-
Bit type: There are different types of router bits, such as straight bits, flush trim bits, and dovetail bits. Each type serves a specific purpose, so consider the joint you want to create before selecting a bit.
-
Shank size: Router bits come with different shank sizes, typically 1/4-inch or 1/2-inch. Ensure that the bit’s shank matches the size of your router’s collet to avoid compatibility issues.
-
Cutting diameter: The cutting diameter determines the width of the cut made by the router bit. Choose a bit with the appropriate cutting diameter for the joint you’re creating.
-
Material: Consider the material you’ll be working with, such as wood or laminate, and choose a router bit specifically designed for that material. Using the wrong bit can result in poor performance or damage to the material.
-
Safety precautions: Always prioritize safety when using a router. Wear safety glasses, use a router table or fence for stability, and follow the manufacturer’s instructions for proper usage and maintenance.
Essential Safety Precautions for Router Use
When it comes to using a router for woodworking, safety should always be a top priority. To ensure a safe working environment, it is essential to wear the appropriate safety gear, such as safety glasses and hearing protection. Additionally, proper setup of the router table and maintaining proper hand placement are crucial for preventing accidents and ensuring accurate results.
Safety Gear for Routers
Wearing the appropriate safety gear is crucial when using a router for woodworking joints. To ensure your safety and protect yourself from potential accidents, here are some essential safety precautions and protective equipment to consider:
- Safety goggles or glasses: Shield your eyes from flying debris and wood chips.
- Ear protection: Reduce the noise level and prevent hearing damage.
- Dust mask or respirator: Filter out harmful dust particles to keep your lungs safe.
- Non-slip gloves: Improve grip and protect your hands from cuts and abrasions.
- Closed-toe shoes: Prevent injuries from falling objects or accidental contact with the router.
Router Table Setup
To ensure a safe and efficient router table setup for woodworking joints, it is essential to follow these essential safety precautions for using a router. First and foremost, always wear the appropriate safety gear, such as safety glasses and ear protection, to protect yourself from flying debris and loud noise. Additionally, make sure to keep your work area clean and free of clutter, as this can reduce the risk of accidents. When setting up your router table, it is important to use the right router table accessories, such as push sticks and featherboards, to ensure proper control and stability. Lastly, pay close attention to router fence alignment, as it plays a crucial role in achieving accurate and consistent cuts. By following these safety precautions, you can create woodworking joints with confidence and peace of mind.
Proper Hand Placement
For proper hand placement when using a router, ensure a firm grip on the handles while keeping your fingers away from the router bit. This is crucial for maintaining control and protecting yourself from potential accidents. Here are some key tips to remember:
- Keep your hands on the handles at all times to maintain stability and control.
- Use your dominant hand to guide the router while keeping your other hand away from the bit.
- Position your hands on the router handles in a way that feels comfortable and secure for you.
- Avoid placing your fingers directly over or near the router bit to prevent any accidental contact.
- Take regular breaks to rest your hands and prevent fatigue, ensuring you have a steady grip for router joint accuracy.
Choosing the Right Router for Joint Making
I found the perfect router for making joints. When it comes to creating woodworking joints, choosing the right router is crucial. There are several router features to consider that will enhance the quality and precision of your joint making. One important feature to look for is variable speed control. This allows you to adjust the speed of the router to match the material you are working with, resulting in cleaner and more accurate cuts. Another feature to consider is a plunge base, which allows you to make plunge cuts for creating mortise and tenon joints. Additionally, a router with a micro-adjustment feature will give you more control over the depth of your cuts, ensuring a perfect fit for your joints.
In terms of router maintenance, it is important to keep your router in good working condition to ensure optimal performance. Regularly cleaning the router and removing any debris or dust buildup is essential. This will prevent any interference with the router’s movement and keep it running smoothly. Lubricating the moving parts of the router, such as the plunge mechanism, can also help maintain its functionality. It is also important to regularly check and tighten any loose screws or bolts to prevent any accidents or damage to the router.
Basic Techniques for Router Joint Creation
Using a router for woodworking joints requires mastering a few basic techniques. To achieve router joint accuracy and strength, here are five essential tips to keep in mind:
-
Proper setup: Ensure that your router is securely mounted and adjusted to the correct depth. This will help you achieve consistent and precise cuts.
-
Choosing the right bit: Selecting the appropriate router bit is crucial for achieving accurate and strong joints. Different bits are designed for specific joint types, such as dovetail, mortise and tenon, or rabbet joints.
-
Using guides and templates: Guides and templates can greatly assist in achieving consistent and accurate cuts. They help maintain straight lines and ensure that your joints fit together perfectly.
-
Taking multiple passes: Rather than trying to cut the entire joint in one pass, it is often better to make multiple shallow passes. This allows for greater control and reduces the risk of tear-out or damage to the wood.
-
Securing the workpiece: Properly securing the workpiece is essential for safety and accuracy. Using clamps or a router table with a fence will help keep the wood stable and prevent any unwanted movement during the cutting process.
Creating Dado Joints With a Router
To create dado joints with a router, it is important to understand the proper technique and setup required. Dado joints are commonly used in woodworking to join two pieces of wood together at a right angle, creating a strong and secure connection. With a router, you can easily create dado joints that are precise and fit perfectly.
One option for creating dado joints with a router is by using a straight bit. First, mark the location of the dado joint on both pieces of wood. Then, set the depth of the router bit to match the thickness of the wood. Next, clamp a straight edge guide along the marked line and adjust the router to ride along the guide. Slowly and steadily, make multiple passes over the marked line until the desired width of the dado joint is achieved.
Another option for creating dado joints is by using a dado bit. This type of bit is specifically designed to create dado joints and has multiple cutters that remove the wood in a single pass. To use a dado bit, set the depth and width of the cut according to your project requirements. Then, carefully guide the router along the marked line, ensuring a smooth and even cut.
Dado joints can also be combined with other joint techniques, such as creating tongue and groove joints or spline joints. These additional techniques can further enhance the strength and stability of the joint. By incorporating tongue and groove joints, you can create a self-aligning joint that is resistant to twisting and warping. Spline joints, on the other hand, involve inserting a thin strip of wood into a slot cut in both pieces of wood, providing additional strength and reinforcement to the joint.
Making Rabbet Joints Using a Router
I’ll guide you through the process of making rabbet joints using a router. First, we’ll need to set up the router properly to ensure precise cuts. Then, I’ll provide you with a step-by-step process to follow for creating strong and accurate rabbet joints. Let’s get started!
Router Setup for Rabbet Joints
For achieving precise rabbet joints in woodworking, a router can be effectively utilized. To set up your router for rabbet joints, follow these steps:
- Choose the right router bit: Select a straight bit or a rabbeting bit that matches the width and depth of the rabbet joint you want to create.
- Set the depth of cut: Adjust the router’s depth of cut to the desired depth of the rabbet joint.
- Secure the workpiece: Use clamps or a vise to hold the workpiece securely in place.
- Mark the rabbet location: Use a marking gauge or a pencil to indicate where the rabbet joint will be cut.
- Make multiple passes: To achieve clean and accurate cuts, make multiple passes, gradually increasing the depth of cut with each pass.
Step-By-Step Rabbet Joint Process
Using a router, I will guide you through the step-by-step process of creating rabbet joints for your woodworking projects. Rabbet joints are a popular choice because of their many advantages. They provide a strong and secure joint, perfect for joining wood at right angles. Rabbet joints also allow for easy assembly and disassembly, which is useful for furniture that needs to be taken apart for transportation or storage. Now, let’s dive into the process. The most common mistake in rabbet joint cutting is not making the correct depth and width measurements. It’s important to accurately measure and mark the dimensions to ensure a precise fit. Another mistake is rushing the process. Take your time and make multiple passes with the router to achieve a smooth and clean cut. By following these steps and avoiding common mistakes, you’ll be able to create sturdy and professional-looking rabbet joints for your woodworking projects.
Creating Mortise and Tenon Joints With a Router
To create strong and precise mortise and tenon joints in woodworking, a router is an invaluable tool. With its ability to accurately cut the required shapes, a router simplifies the process and ensures a snug fit between the two pieces of wood. However, there are alternatives to using a router for creating these joints. Here are some options to consider:
- Hand tools: Traditional woodworking tools like chisels and saws can be used to create tenon joints without a router. While this method requires more time and effort, it allows for a greater level of control and precision.
- Drill press: A drill press, equipped with a mortising attachment, can be used to create mortises for the tenon joints. The attachment guides the drill bit, ensuring accurate and consistent results.
- Mortiser machine: A dedicated mortiser machine is specifically designed for creating mortises in woodworking. This machine simplifies the process by providing a stable platform and precise control over the depth and width of the mortise.
- Doweling jig: Instead of using a traditional mortise and tenon joint, a doweling jig can be employed to create strong joints. The jig guides the drill bit, allowing for accurate alignment and placement of dowels.
- Biscuit joiner: A biscuit joiner is another alternative to consider. This tool cuts crescent-shaped slots into the wood, allowing for the insertion of biscuits. The biscuits, when glued in place, provide strength and alignment to the joint.
While a router is often the preferred tool for creating mortise and tenon joints, these alternatives offer flexibility and options for those who may not have access to one or prefer a different approach. Experimenting with different techniques can lead to discovering new methods that suit your woodworking style. So, don’t be afraid to explore and find what works best for you.
Using a Router for Box Joint Construction
When it comes to box joint construction with a router, there are a few key points to consider. First, the size and power of the router are important factors in achieving clean and precise cuts. Second, selecting the proper bit for the job is crucial in creating tight-fitting joints. Lastly, mastering the technique for making smooth cuts is essential for achieving professional-looking results.
Router Size and Power
I find that selecting the appropriate router size and power is crucial when constructing box joints. The right router can make all the difference in achieving clean, precise cuts and ensuring the joint fits together perfectly. Here are some key considerations to keep in mind:
- Power: A router with higher horsepower will handle heavy-duty tasks more efficiently.
- Size: Smaller routers are more maneuverable and ideal for intricate, detailed work, while larger ones are better suited for larger projects.
- Variable Speed: Look for routers with adjustable speed settings to accommodate different types of wood and cutting techniques.
- Ergonomics: Consider the weight and grip of the router to ensure comfort during long hours of use.
- Compatibility: Check that the router is compatible with the router bits you plan to use for box joint construction.
Proper Bit Selection
Selecting the right router bit is essential for achieving precise and clean box joints when using a router for woodworking. It’s important to consider the type of bit, its size, and the material you’re working with. For box joints, a straight bit or a spiral upcut bit are commonly used. Straight bits are ideal for creating square and clean-cut joints, while spiral upcut bits help with chip removal and reduce the chances of tear-out. It’s crucial to regularly maintain your router bits to ensure optimal performance. This includes cleaning them after each use and sharpening them when needed. Additionally, if you encounter any issues with your router, such as vibration or overheating, it’s important to troubleshoot the problem and address it promptly to avoid compromising the quality of your box joints.
Technique for Clean Cuts
To achieve clean cuts when using a router for box joint construction, I recommend employing a steady and controlled feed rate. This technique is crucial for achieving precision in your woodworking projects. Here are some tips to help you master the clean cut technique:
- Maintain a consistent pressure on the router as you guide it along the wood.
- Use a sharp and high-quality router bit to ensure clean and smooth cuts.
- Take your time and avoid rushing the process to maintain control and accuracy.
- Secure your workpiece firmly to prevent any movement that may result in uneven cuts.
- Make sure to keep the router base flat on the surface to achieve a clean and even cut.
Creating Dovetail Joints With a Router
Using a router is an effective method for creating dovetail joints in woodworking projects. When it comes to creating dovetail joints, there are alternatives to using a router, such as using hand tools. However, in my experience, using a router has proven to be more efficient and precise.
| Router for Dovetail Joints | Hand Tools for Dovetail Joints |
|---|---|
| Faster and more efficient | Requires more time and effort |
| Provides precise and consistent results | Can be challenging to achieve precision |
| Allows for customization and versatility | Limited customization options |
| Suitable for both beginners and experienced woodworkers | Requires skill and practice |
| Offers a smoother finish | May result in rougher edges |
Using a router for creating dovetail joints offers several advantages. Firstly, it is a faster and more efficient method compared to using hand tools. With a router, I can achieve precise and consistent results, saving me valuable time and effort. Additionally, using a router allows for customization and versatility in design, giving me the freedom to create unique and intricate dovetail joints.
While hand tools may have their merits, they require more time and effort to produce satisfactory results. Achieving precision with hand tools can be challenging and may result in less consistent joints. Moreover, hand tools offer limited customization options compared to a router.
Making Finger Joints Using a Router
I prefer utilizing a router when making finger joints for woodworking projects. The router allows for precise and clean cuts, resulting in a professional-looking joint. Here are a few reasons why I find using a router for finger joints to be the best option:
- Versatility: A router can be used to create a variety of finger joint sizes and configurations, allowing for flexibility in your woodworking designs.
- Efficiency: Using a router speeds up the process of creating finger joints, saving you valuable time and energy.
- Accuracy: With the right setup and a steady hand, a router ensures that each finger joint is cut to the exact measurements, resulting in a tight and seamless fit.
- Customization: By adjusting the depth and width of the router bit, you can create finger joints that perfectly suit your project’s requirements.
- Strength: The precision of a router-cut finger joint ensures a strong and durable connection between the pieces of wood, providing stability and longevity to your woodworking projects.
To ensure the longevity and optimal performance of your router, regular maintenance is essential. Here are a few tips for router maintenance:
- Keep the router clean by removing sawdust and debris regularly.
- Lubricate the router’s moving parts to prevent friction and ensure smooth operation.
- Check and replace worn-out router bits to maintain clean and accurate cuts.
- Regularly inspect the power cord and switch for any signs of damage.
- Store the router in a dry and secure place when not in use.
If you encounter any issues with your router, troubleshooting can help identify and resolve the problem. Here are some common router issues and their potential solutions:
- Router not turning on: Check the power source and ensure that the router is properly plugged in. If necessary, replace the power cord or check the circuit breaker.
- Poor cutting performance: Clean the router bit and make sure it is sharp. Adjust the router’s speed and feed rate to match the wood being cut.
- Excessive vibration: Check for loose parts and tighten them accordingly. Inspect the router’s motor and bearings for any signs of damage.
Using a Router for Dowel Joints
For creating strong and secure connections in woodworking projects, utilizing a router for dowel joints is an effective and reliable method. When it comes to joinery, a router is an invaluable tool that can simplify the process and ensure precise and accurate results. The advantages of using a router for dowel joints are numerous.
Firstly, a router allows for precise positioning of the dowel holes. With the help of a router jig or template, you can easily create evenly spaced and accurately aligned holes. This ensures that the dowels fit snugly into the joints, resulting in a strong and secure connection.
Secondly, a router provides the ability to adjust the depth of the dowel holes. This is especially useful when working with different thicknesses of wood or when creating joints of varying depths. By adjusting the router’s depth setting, you can ensure that the dowels are inserted at the correct depth, creating flush and seamless joints.
Additionally, using a router for dowel joints allows for efficient and quick work. The router’s high-speed cutting action ensures clean and precise holes, reducing the need for additional sanding or cleaning up. This saves both time and effort, allowing you to complete your woodworking projects more efficiently.
Tips for Achieving Precise Router Joints
To achieve precise router joints, it is important to pay attention to the alignment of the workpiece and the router. Here are some tips that will help you achieve precision and make your woodworking projects stand out:
-
Secure the workpiece: Ensure that the workpiece is securely fastened to the workbench or clamped down. This will prevent any movement or vibrations that could affect the accuracy of the router cuts.
-
Use a straight edge or guide: Utilize a straight edge or guide to ensure straight cuts. This will act as a reference point and help you maintain a consistent and accurate path for the router.
-
Start with shallow passes: When making cuts, it is best to start with shallow passes and gradually increase the depth. This will allow you to have better control over the router and achieve smoother, more precise cuts.
-
Practice proper hand placement: Maintain a firm grip on the router with both hands, and position them in a way that gives you maximum control. This will ensure steady and accurate movements as you guide the router along the workpiece.
-
Test on scrap wood: Before making cuts on your actual workpiece, it is advisable to test the router settings and techniques on a piece of scrap wood. This will allow you to make any necessary adjustments and ensure that you achieve the desired precision before committing to your project.
Finishing and Sanding Router Joints for a Professional Look
After achieving precise router joints, the next step is to focus on finishing and sanding the joints to give your woodworking project a professional look. Proper finishing techniques and sanding tips can make a significant difference in the final appearance of your work. Here are some tips to help you achieve a flawless finish and smooth, polished surfaces.
| Finishing Techniques | Sanding Tips |
|---|---|
| Apply a Wood Finish | Use the Right Grit |
| ———————- | ———————- |
| Choose the Right Brush | Sand in the Direction |
| ———————- | ———————- |
| Apply Multiple Coats | Use Adequate Pressure |
| ———————- | ———————- |
| Sand Between Coats | Protect Yourself |
When it comes to finishing techniques, applying a wood finish is essential. It not only enhances the beauty of the wood but also protects it from moisture and wear. Choose a finish that suits your project, such as oil-based, water-based, or lacquer.
For sanding, using the right grit is crucial. Start with a coarse grit sandpaper to remove any imperfections or rough spots. Then gradually move to finer grits for a smooth finish. Remember to sand in the direction of the wood grain to avoid scratches.
Using the appropriate brush for applying finish is also important. A brush with natural bristles is ideal for oil-based finishes, while a synthetic bristle brush works well with water-based finishes. This ensures a smooth and even application.
When applying multiple coats of finish, allow each coat to dry completely before sanding between coats. This helps to create a seamless and flawless finish. It’s also essential to protect yourself by wearing safety goggles and a dust mask to prevent any respiratory problems from inhaling the fine dust particles generated during sanding.


