As I stood there, gazing at the assortment of tools in front of me, a nail gun caught my eye. Its sleek design and powerful capabilities intrigued me, but as a beginner, I couldn’t help but feel a sense of apprehension. How does one even begin to navigate the world of nail guns? Where should I start? Well, if you’re anything like me and eager to embark on your next DIY project, then this beginner’s guide to using a nail gun is just what you need. So, let’s dive in and uncover the essential knowledge and tips that will equip you with the confidence to tackle any nailing task ahead.
Key Takeaways
- Adhere to safety precautions and wear appropriate protective gear when using a nail gun.
- Familiarize yourself with the different types of nail guns and choose the right nails for each type.
- Understand the parts and operation of a nail gun, including loading nails, adjusting depth and angle, and troubleshooting jams.
- Follow a maintenance and cleaning routine for your nail gun to ensure its proper functioning and longevity.
Importance of Safety Precautions
Using a nail gun requires strict adherence to safety precautions to prevent accidents and injuries. As someone who desires to serve others, it is crucial to prioritize safety when operating this powerful tool. By following the necessary safety measures, we can minimize the risk of common injuries associated with nail gun usage.
First and foremost, always wear appropriate personal protective equipment (PPE) when using a nail gun. This includes safety glasses to protect your eyes from flying debris, as well as ear protection to prevent hearing damage caused by the loud noise. Additionally, wearing gloves can provide a better grip and protect your hands from potential harm.
Furthermore, it is essential to keep the nail gun pointed away from yourself and others at all times. Avoid pointing it towards any body part, even if it is not loaded or in use. Accidental discharge can occur, leading to severe injuries.
Maintaining a clean and organized work area is another crucial safety precaution. Clear away any debris, nails, or other potential hazards that could cause accidents. It is also important to ensure that the nail gun is in good working condition before each use. Regular maintenance and checks can help prevent malfunctions or misfires.
Lastly, never underestimate the importance of proper training and education. Familiarize yourself with the manufacturer’s instructions, safety guidelines, and any specific precautions for the nail gun you are using. Attending a training course or seeking guidance from experienced professionals can provide valuable insights and techniques to enhance safety.
Understanding Different Types of Nail Guns
To better understand the world of nail guns, it is important to familiarize oneself with the different types available. There are three main types of nail guns: framing nail guns, finish nail guns, and brad nail guns. Each type is designed for specific tasks and uses different types of nails.
Framing nail guns are commonly used in construction and carpentry projects. They are powerful tools that can drive large, thick nails into wood. These nail guns are ideal for tasks such as framing walls, building decks, and installing joists. When using a framing nail gun, it is important to choose nails that are long enough and have enough holding power for the project at hand.
Finish nail guns, on the other hand, are perfect for more delicate and precise work. They are commonly used for trim work, molding, and installing cabinets. Finish nail guns use thinner and shorter nails that leave smaller holes, making them easier to conceal. When choosing nails for a finish nail gun, it is important to consider the material being worked on and the desired finish.
Brad nail guns are the smallest and most lightweight type of nail guns. They are designed for tasks that require even smaller and thinner nails, such as attaching lightweight trim and moldings, and assembling small pieces of furniture. When selecting nails for a brad nail gun, it is important to choose nails that are the appropriate length for the task and have a small gauge to prevent splitting the wood.
When choosing the right nails for your project, always consider the type of nail gun you will be using and the specific requirements of the task at hand. By selecting the correct type and size of nails, you can ensure that your project is completed safely and efficiently.
Choosing the Right Nail Gun for Your Project
When selecting a nail gun for your project, consider the specific requirements and tasks at hand. To help you make the right choice, here are some key factors to consider:
- Types of nails suitable for different materials:
- For wood projects, choose a nail gun that can accommodate framing nails or finish nails. Framing nails are ideal for heavy-duty applications, such as building a deck or framing a wall. On the other hand, finish nails are perfect for delicate trim work and attaching moldings.
- If you’re working with concrete or masonry, opt for a nail gun that can handle concrete nails. These nails are designed to penetrate hard materials and provide a secure hold.
- For upholstery and fabric projects, a staple gun is the tool of choice. Look for a nail gun that can use staples of different sizes to accommodate your specific needs.
Tips for using a nail gun efficiently and effectively:
- Always wear safety goggles and gloves to protect yourself from flying debris and potential injuries.
- Before starting, ensure that the nail gun is properly adjusted and securely fastened to avoid any accidents.
- Practice good trigger control by applying steady pressure and releasing it only when the nail is fully driven into the material.
- Keep the nail gun clean and well-maintained to ensure its optimal performance and longevity.
Familiarizing Yourself With the Parts of a Nail Gun
After considering the specific requirements and tasks at hand when choosing the right nail gun for your project, it is important to familiarize yourself with the various parts of the tool. This knowledge will not only help you operate the nail gun effectively but also ensure its proper maintenance. Let’s dive into the essential parts of a nail gun that you need to know.
-
Magazine: The magazine is where the nails are loaded. It holds a strip or coil of nails that are automatically fed into the tool.
-
Trigger: The trigger is the control mechanism that activates the nail gun. It can be pressed to fire a nail or released to stop firing.
-
Depth adjustment: Most nail guns have a depth adjustment feature that allows you to control how deep the nails are driven into the material. This is crucial for preventing common mistakes like overdriving or underdriving nails.
-
Nosepiece: The nosepiece is the front end of the nail gun. It guides the nails and provides stability while you’re working.
-
Safety tip: Nail guns are equipped with a safety tip that must be pressed against the material before the trigger can be pulled. This prevents accidental firing and ensures safe operation.
-
Exhaust vent: Some nail guns have an exhaust vent that directs air away from the user. It helps keep the work area clean and prevents debris from getting into your eyes.
Getting to Know the Different Types of Nails
Let’s explore the various types of nails to enhance our understanding of their differences and applications. When it comes to different nail sizes, there are a few options to consider:
-
Common Nails: These nails are the most versatile and widely used. They come in various lengths and are suitable for general woodworking projects, framing, and construction tasks. Common nails have a wide head that provides good holding power.
-
Finish Nails: If you’re working on projects that require a clean and polished appearance, finish nails are the way to go. They have a smaller head which can be easily concealed with putty or wood filler. Finish nails are commonly used for trim work, cabinetry, and furniture making.
-
Brad Nails: Brad nails are even smaller than finish nails and are perfect for delicate work, such as attaching thin pieces of wood or trim. They leave minimal visible marks, making them ideal for projects where aesthetics matter.
Using nails over other fasteners has its own set of benefits. Nails are quick and easy to use, allowing for efficient and convenient installation. They also provide good holding power, ensuring that your work stays in place. Additionally, nails are less likely to cause splitting or cracking in the wood compared to screws. However, it’s important to choose the right nail for the job to ensure optimal results.
Loading Nails Into Your Nail Gun
Now that we have familiarized ourselves with the different types of nails, let’s move on to the next step: loading nails into your nail gun. Loading nails is an essential part of using a nail gun effectively and efficiently. Proper loading not only ensures smooth operation but also helps prevent jamming and other issues.
To load nails into your nail gun, follow these simple steps:
-
First, make sure you have the correct type and size of nails for your nail gun. Using the wrong nails can lead to jams and damage to your tool. Refer to the manufacturer’s instructions or consult a professional if you are unsure.
-
Next, locate the nail magazine on your nail gun. This is where the nails will be loaded.
-
Open the magazine by sliding or releasing the latch. This will allow you to access the nail chamber.
-
Place the nails into the magazine, making sure they are aligned properly. The nail heads should be facing towards the front of the gun.
-
Close the magazine securely, ensuring that it locks into place.
Once the nails are loaded, you are ready to use your nail gun. However, it’s important to remember that regular nail gun maintenance is crucial to keep your tool in good working condition. Clean the nail gun after each use, removing any debris or dust that may have accumulated. Lubricate the moving parts as recommended by the manufacturer.
In the event of a nail gun jam, troubleshooting steps can help resolve the issue. First, disconnect the nail gun from the power source and remove any remaining nails from the magazine. Inspect the magazine and the nail chamber for any obstructions or bent nails. Clear any debris or straighten any bent nails before reloading the gun.
Adjusting the Nail Gun for Depth and Angle
How can you adjust the nail gun for depth and angle to ensure accurate and precise nail placement?
Adjusting the nail gun for depth and angle is crucial in achieving accurate and precise nail placement. Here are three simple steps to help you adjust your nail gun effectively:
-
Check the nail gun pressure: Before starting any project, it’s important to check the pressure settings on your nail gun. Adjusting the pressure ensures that the nails are driven to the correct depth. Refer to the manufacturer’s instructions to find the appropriate pressure for your specific nail gun model.
-
Experiment with different angles: Different projects may require nails to be driven in at various angles. By adjusting the angle of the nail gun, you can ensure that the nails are inserted at the desired angle for optimal results. Practice on scrap materials to find the right angle before starting your project.
-
Troubleshoot nail gun jams: Nail gun jams can be frustrating, but they can often be resolved with a few troubleshooting steps. If your nail gun jams, first disconnect the power source and remove any remaining nails. Check for any obstructions or debris that may be causing the jam. Once cleared, reassemble the nail gun and test it on scrap materials to ensure it is working properly.
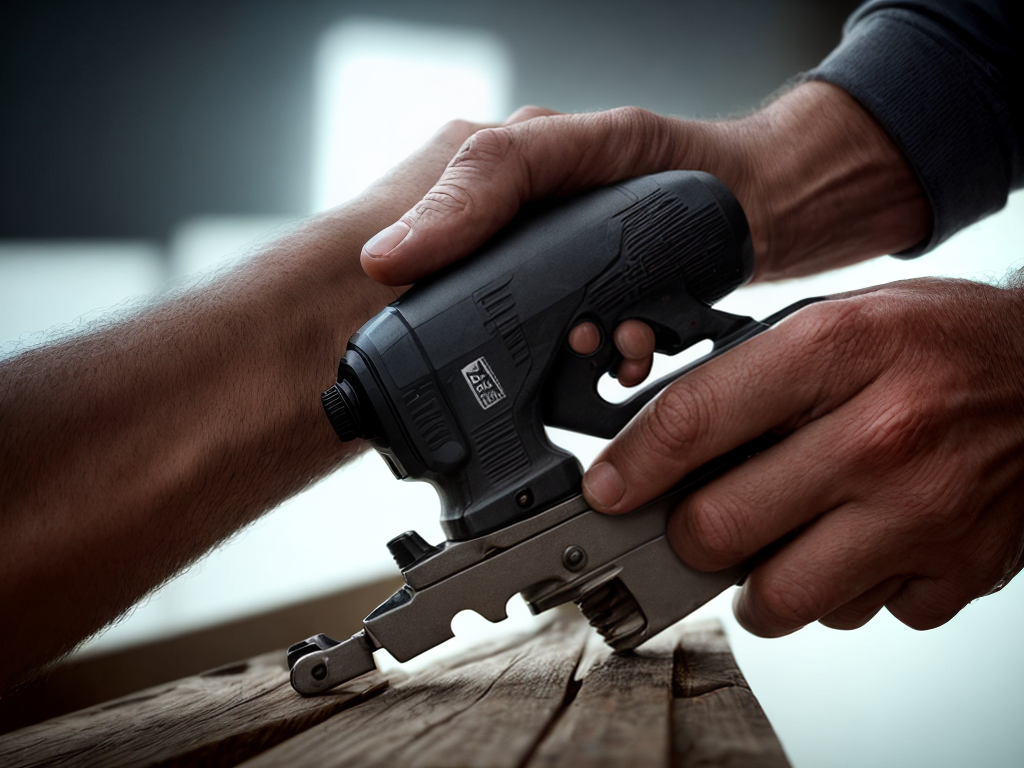
Proper Grip and Handling Techniques
Using a firm and secure grip on the nail gun is essential for safe and effective operation. As someone who desires to serve others, it is important to understand the proper grip and handling techniques when using a nail gun. Not only does it ensure your safety, but it also helps you achieve accurate and efficient results.
First and foremost, before even picking up the nail gun, it is crucial to familiarize yourself with the manufacturer’s instructions and guidelines for proper usage. Understanding nail gun maintenance is essential to keep the tool in good condition and prevent any malfunctions. Regularly inspect and clean the nail gun, and make sure all the parts are functioning correctly.
When gripping the nail gun, make sure your hand is positioned comfortably and securely. Your hand should wrap around the handle, with your fingers resting on the trigger. It is important to have a firm grip to maintain control over the tool while operating it.
Additionally, always practice proper safety precautions for nail gun storage. When not in use, store the nail gun in a secure and locked cabinet or toolbox, out of reach from children or any unauthorized individuals. This helps prevent accidents and ensures that only trained individuals have access to the tool.
Positioning Yourself and the Workpiece
To ensure safe and accurate operation, proper positioning of yourself and the workpiece is crucial when using a nail gun. Here are some important tips to keep in mind:
-
Workpiece Positioning: Before you start using the nail gun, make sure the workpiece is properly secured. This will prevent any unnecessary movement that could lead to inaccurate nail placement or potential accidents. Use clamps or other holding devices to keep the workpiece steady and in place.
-
Body Posture: Maintaining the correct body posture is essential for both your comfort and safety. Stand with your feet shoulder-width apart to provide a stable base. Keep your back straight and avoid leaning over the workpiece, as this can strain your back and affect your aim. Instead, position yourself comfortably so that you have a clear line of sight to the area where you will be nailing.
-
Distance: It’s important to maintain a safe distance between yourself and the workpiece. This will help prevent accidental injuries if the nail gun misfires or if a nail ricochets off the workpiece. Stand at a reasonable distance, ensuring that you have enough space to maneuver the nail gun without risking any harm.
Basic Nail Gun Operation
I find it helpful to familiarize myself with the basic operation of a nail gun before using it. Not only does this ensure my safety, but it also allows me to work efficiently and effectively. One important aspect of using a nail gun is understanding the importance of maintenance. Regular cleaning and lubrication of the nail gun can greatly extend its lifespan and prevent malfunctions. It is also crucial to check the nail gun for any loose or damaged parts before each use.
Now, let’s talk about some common user mistakes to avoid. One mistake I often see is using the wrong type of nails for the nail gun. It’s essential to use the correct size and type of nails recommended by the manufacturer to prevent jamming or damaging the tool. Another mistake is not properly adjusting the depth setting. Adjusting the depth setting ensures that the nails are driven to the right depth for the specific material being worked on. Failure to do so can result in nails being driven too deep or not deep enough.
Lastly, it’s important to remember to always keep a firm grip on the nail gun and use it with both hands. This helps maintain control and prevent accidents. Additionally, never point the nail gun at anyone, even if it is not loaded. Safety should always be the top priority when using any power tool.
Troubleshooting Common Nail Gun Issues
One common issue that may arise when using a nail gun is jamming. This can be frustrating, but don’t worry, troubleshooting jammed nails is easier than you think. Here are a few steps to help you get back on track:
-
Check the power source: If your nail gun is not firing at all, the first thing to do is ensure that it is properly connected to a power source. Check if the power cord is securely plugged in or if the battery is charged. Sometimes, troubleshooting power issues is as simple as making sure the tool has enough power to operate.
-
Clear the jam: If your nail gun is jammed, the next step is to clear the jammed nails. Start by disconnecting the power source to avoid any accidents. Then, open the nail gun’s magazine and carefully remove any nails that are causing the jam. Make sure to follow the manufacturer’s instructions for this process.
-
Inspect the nail gun: After clearing the jam, take a moment to inspect the nail gun for any signs of damage or wear. Look for bent or broken nails, loose parts, or any other issues that may have caused the jam. If you notice any problems, it may be necessary to replace or repair the affected parts.
Maintaining and Cleaning Your Nail Gun
Regular maintenance and proper cleaning are essential for keeping your nail gun in optimal condition. By following a regular maintenance schedule and using proper cleaning techniques, you can extend the lifespan of your tool and ensure it continues to work efficiently.
To keep your nail gun clean, start by disconnecting the tool from the power source and removing any remaining nails. Use a soft brush or compressed air to remove dust, debris, and other build-up from the nail gun’s exterior and interior. Pay special attention to the air vents, as clogs can affect the performance of the tool. Avoid using any harsh chemicals or solvents when cleaning, as they can damage the components of the nail gun.
In addition to regular cleaning, it’s important to follow a maintenance schedule to keep your nail gun in top shape. This includes inspecting the tool for any signs of wear or damage, such as cracked hoses or loose fittings. Replace any worn or damaged parts as soon as possible to prevent further issues. Lubricating the moving parts of the nail gun regularly is also crucial for smooth operation. Refer to the manufacturer’s instructions for the recommended lubricant and frequency of application.
Safety Tips for Using a Nail Gun
When it comes to using a nail gun, safety should always be a top priority. To ensure your well-being, there are a few key points to keep in mind. First, wearing the necessary protective gear, such as safety goggles and gloves, is essential. Secondly, practicing proper handling techniques, like keeping your finger off the trigger when not in use and never pointing the nail gun at anyone, can prevent accidents.
Protective Gear Essentials
To ensure maximum safety when using a nail gun, it is essential to wear the appropriate protective gear. Here are the essential safety gear items you need to keep yourself protected:
- Safety glasses: These will protect your eyes from flying debris and prevent any potential eye injuries.
- Ear protection: Nail guns can be loud, so it’s important to wear earplugs or earmuffs to safeguard your hearing.
- Work gloves: Investing in a good pair of work gloves will not only protect your hands from sharp nails but also provide a better grip on the tool.
When it comes to protective equipment selection, make sure to choose gear that fits properly and is specifically designed for the task. Prioritizing safety is crucial to avoid accidents and injuries while using a nail gun. Stay safe and protect yourself with these essential gear items.
Proper Handling Techniques
Using a nail gun safely requires proper handling techniques and adherence to important safety tips. One of the most crucial aspects of handling a nail gun correctly is ensuring a proper grip. To achieve this, hold the nail gun with both hands, maintaining a firm and steady grip. This will provide you with better control and stability while operating the tool. Additionally, it is essential to avoid common mistakes that can lead to accidents. Always keep your finger off the trigger until you are ready to fire, and never carry the nail gun with your finger on the trigger. Also, remember to never point the nail gun at yourself or others, even if it is not loaded. By following these proper grip techniques and avoiding common mistakes, you can ensure a safer and more efficient nail gun experience.
Recommended Accessories for Nail Gun Use
I highly recommend incorporating essential accessories into your nail gun usage for improved efficiency and safety. Using the right accessories can make a significant difference in your overall experience and the quality of your work. Here are some accessory options that I believe are essential for every nail gun user:
-
Safety goggles: Protecting your eyes should always be a top priority when using power tools. Safety goggles shield your eyes from flying debris and prevent potential eye injuries. They are a simple but crucial accessory that should never be overlooked.
-
Hearing protection: Nail guns can be quite loud, and prolonged exposure to high noise levels can damage your hearing. Wearing earplugs or earmuffs while operating a nail gun is a best practice that ensures you’re protecting your hearing in the long run.
-
Work gloves: While not directly related to the nail gun itself, wearing work gloves can provide an added layer of protection. They can prevent cuts, abrasions, and splinters while handling materials or working in tight spaces. Look for gloves that offer good dexterity, so you can maintain control and precision while operating the nail gun.
Project Ideas and Inspiration for Using a Nail Gun
With a nail gun in hand, the possibilities for creative projects are endless. Whether you’re a DIY enthusiast or a professional carpenter, using a nail gun opens up a world of project ideas and creative inspiration. Here are some exciting projects that you can tackle with your trusty nail gun:
| Project Ideas | Creative Inspiration |
|---|---|
| Build a Bookshelf | Transform a bare wall into a stylish and functional bookshelf. Customize the design and size to fit your space and showcase your favorite books and decorative items. |
| Construct a Deck | Create a beautiful outdoor space by building a deck with your nail gun. Choose from various materials like wood or composite, and design a deck that matches your aesthetic and provides a cozy spot for relaxation. |
| Assemble Furniture | Skip the frustration of using a manual screwdriver and assemble furniture with ease using a nail gun. Whether it’s a coffee table, chair, or bed frame, your nail gun will make the process quick and efficient. |
These are just a few examples, but the possibilities are truly endless. From building a garden shed to constructing a pergola, your nail gun can handle it all. Remember to prioritize safety and wear protective gear while working on any project. Additionally, always follow the manufacturer’s instructions and guidelines for proper use of your nail gun.


